Author: Adeeba Shah

  • Building an AI Pipeline for CAD + Simulation Using Prompts | Simutecra

    Building an AI Pipeline for CAD + Simulation Using Prompts | Simutecra

    The Problem: Your Design and Simulation Stages Are Still Disconnected

    Here’s a situation most mechanical engineers know well. You finish a CAD model, export the geometry, hand it to a simulation analyst (or switch tools yourself), spend half a day setting up the mesh and boundary conditions, run the solver overnight, get results that point to a design change, and then go back to the beginning.

    That cycle, design, export, setup, simulate, revise, is slow. It was designed for a world where simulation was expensive and rare. But in 2026, simulation tools are faster and AI is everywhere. The bottleneck isn’t the solver anymore. It’s the AI CAD pipeline connecting everything together.

    What engineers actually need is an AI-driven engineering pipeline, a connected sequence of intelligent tools and prompts that carries a design from concept through CAD modelling, FEA or CFD setup, results interpretation, and documentation without the constant manual handoffs that kill momentum.

    That’s exactly what this guide builds. Step by step. With real prompts you can use today.

    3
    hrs/daysaved on average
    Industry benchmarks for 2026 show that integrating AI into the CAD-to-simulation workflow saves engineers an average of 3 hours per day, reclaimed from manual data extraction, repetitive setup, and documentation (Energent.ai, 2026).
    94.4%
    AI accuracy
    Leading AI data agents now achieve up to 94.4% accuracy when reading complex unstructured engineering documents and schematics, dramatically reducing downstream specification errors.

    What an AI Pipeline for CAD and Simulation Actually Looks Like

    Before building one, it helps to have a clear mental model. An AI pipeline for CAD and simulation is not a single tool, it’s a chain of connected AI interactions, each stage feeding the next with better, more specific information.

    Think of it like a relay race. The first runner (your LLM for engineering design) carries the design intent. The second (your CAD tool or text-to-CAD platform) turns that intent into geometry. The third (your FEA or CFD solver with AI setup) validates the geometry against physics. The fourth (your AI interpretation layer) tells you what the results mean and what to change. The baton never drops. The pipeline keeps moving.

    What makes this different from just ‘using AI tools’ is the prompt-based CAD workflow that threads through every stage. Prompts aren’t just for chatting, they’re the connective tissue of the pipeline. The right prompt at each stage ensures the output of one tool becomes a clean, usable input for the next. That’s what CAD simulation using prompts actually means in practice.

    AI pipeline for CAD and simulation using prompts 5-stage flow diagram mechanical engineering 2026

    The Four Roles Prompts Play in the Pipeline

    Understanding how prompts function at each stage clarifies why prompt engineering for design and simulation is worth learning deliberately, not just picking up informally.

    • Prompt as brief: At the design stage, a structured prompt is your engineering requirements document, it captures loads, materials, constraints, and manufacturing intent in a format AI tools can act on directly.
    • Prompt as translator: Between CAD and simulation, a prompt converts geometry decisions into AI prompts for FEA and simulation, boundary conditions, mesh guidance, load cases, and solver settings expressed in clear language.
    • Prompt as analyst: After simulation, a prompt frames your results for AI interpretation, ‘This stress concentration is at the fillet. What does that indicate and what geometry change would address it?’
    • Prompt as documenter: At the close of the pipeline, a prompt generates technical reports, design summaries, and revision notes automatically, closing the AI design loop cleanly.

    How to Build an AI CAD Simulation Pipeline, The 5 Stages

    Here is how to build a working AI pipeline for CAD and simulation using prompts. Each stage includes the tool stack, the prompt structure, and what to hand forward to the next stage. These aren’t theoretical, they’re the practices that effective AI simulation workflow teams are using in 2026.

    1. Design Brief, Define Intent Before You Touch the Software
    Most pipeline failures start here. Engineers open CAD immediately and start modelling before the requirements are precise. An AI-driven pipeline starts with a structured brief that captures everything the downstream stages need: geometry constraints, loads, materials, manufacturing method, and success criteria.
    Prompt, Stage 1 Design Brief (use with Claude AI):
    “You are a senior mechanical engineer. I need to design [part description]. Loads: [specify]. Material: [specify]. Manufacturing: [specify, e.g. CNC aluminium]. Key constraints: [tolerances, fits, standards]. Output a structured engineering brief with: (1) critical dimensions to define, (2) primary failure modes to simulate, (3) recommended simulation type (FEA/CFD/thermal), (4) suggested boundary conditions.”

    Keywords active: Claude AI engineering prompts · LLM for engineering design · prompt-based CAD workflow
    2. CAD Modelling, Geometry From Your Brief
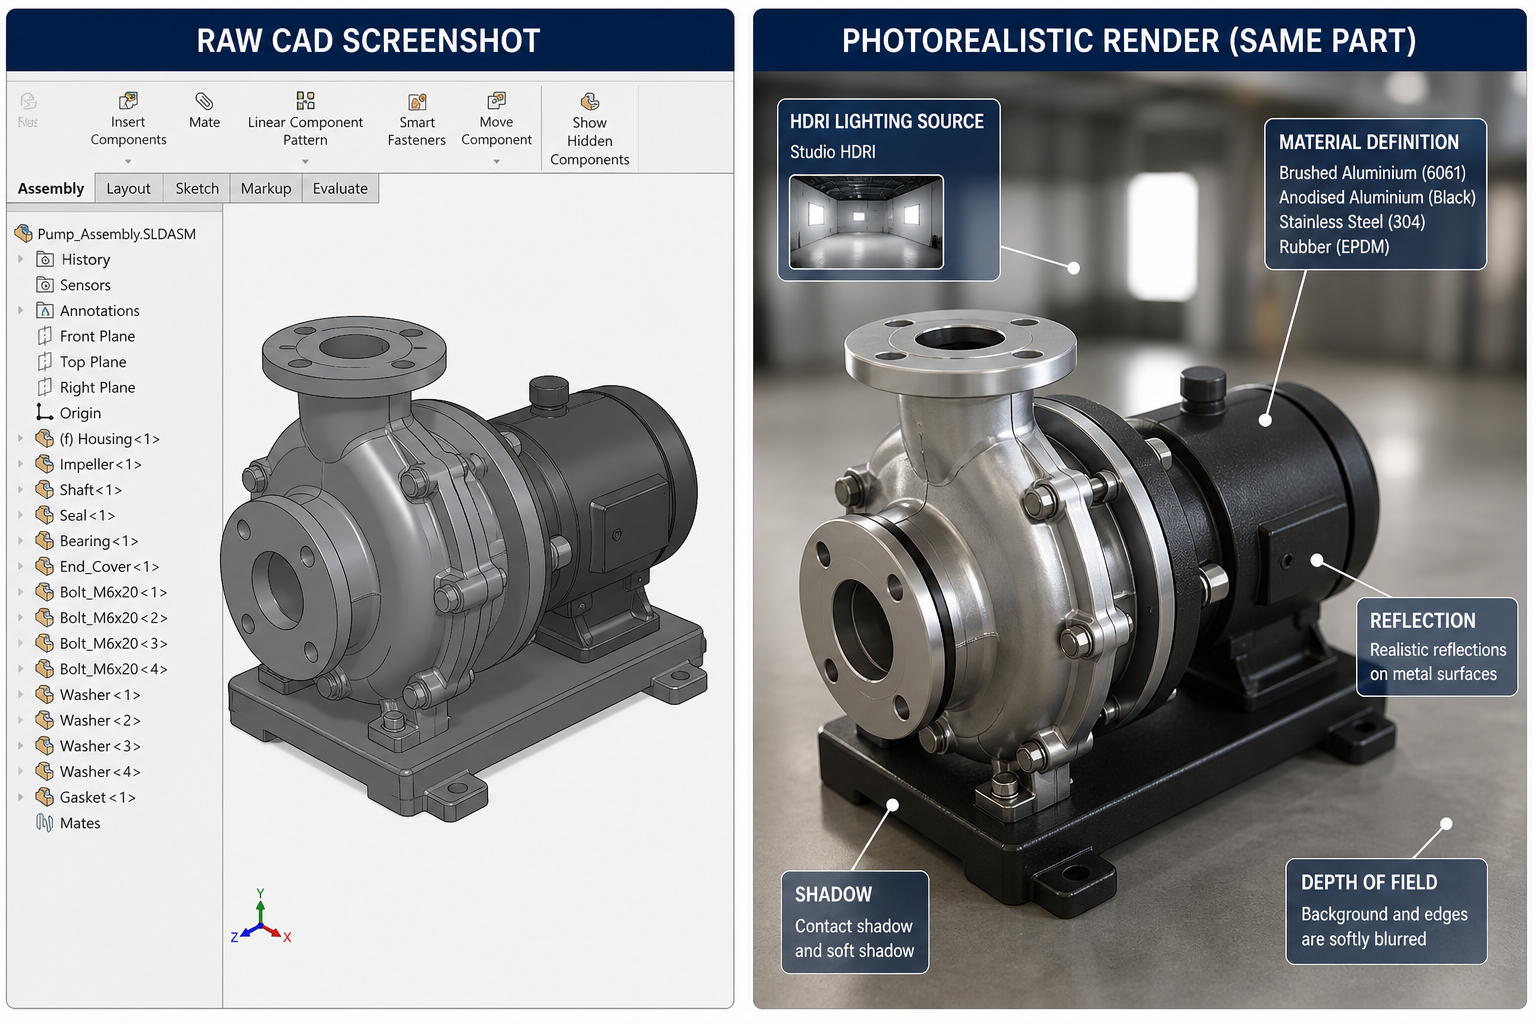
    Take your Stage 1 brief directly into your CAD or text-to-CAD tool. The brief is already formatted in the way AI geometry tools work best: specific, dimensioned, and constraint-aware. This is where connecting CAD to simulation with AI begins, the model you build now must be simulation-ready from the start.
    Prompt, Stage 2 CAD Model (use with Zoo, AdamCAD, or SolidWorks + Claude):
    Based on this engineering brief: [paste brief from Stage 1]. Generate a [STEP / parametric feature list / AutoLISP script] for this part. Ensure all simulation-critical features, fillets, contact surfaces, load application areas, are explicitly defined. Flag any geometry that may require simplification before meshing.”
    Keywords active: connecting CAD to simulation with AI · Zoo text-to-CAD pipeline · CAD AI prompts
    3. Simulation Setup, The Bridge Most Engineers Get Wrong
    This is the stage where most manual pipelines collapse. Moving a CAD model into FEA or CFD correctly requires specialist knowledge of meshing, boundary conditions, and solver settings. AI FEA automation now handles the bulk of this, but only if you feed it well-structured prompts.
    Prompt, Stage 3 Simulation Setup (use with SimScale AI, Ansys, or Claude for setup notes):
    “I have a [material + geometry description] part. Load case: [describe loads and constraints]. I need to set up a [static structural / modal / CFD] simulation. Output: (1) recommended mesh density at critical features, (2) boundary condition checklist, (3) material properties to confirm, (4) expected failure modes to monitor in post-processing, (5) convergence criteria.”
    Keywords active: AI prompts for FEA and simulation · CAD to FEA automation · Ansys SimAI pipeline
    4. Results Interpretation, From Numbers to Engineering Decisions
    Raw simulation output, stress plots, displacement fields, pressure distributions, is information, not insight. This is where the AI interpretation layer converts numbers into engineering decisions. The prompt structures your results in a way that surfaces the most important findings and recommends specific design changes.
    Prompt, Stage 4 Results Interpretation (use with Claude AI):
    “I have run a static FEA on a [part description]. Results: maximum von Mises stress = [X] MPa at [location], material yield = [Y] MPa, safety factor = [Z]. Displacement at load point = [A] mm. Tell me: (1) Is this design safe? (2) What is driving the peak stress, geometry or boundary conditions? (3) What are the top 2 design changes I should model next? (4) Are there any non-obvious failure modes I should check?”
    Keywords active: AI-powered design validation · automated simulation pipeline · AI design loop
    4. Documentation, Closing the Pipeline Cleanly
    The last stage is where most AI pipelines leak value. Engineers interpret their results, make design changes, and move on, without recording the engineering rationale. A single prompt closes this gap and produces documentation that serves revision history, client reporting, and team knowledge transfer simultaneously.
    Prompt, Stage 5 Documentation (use with Claude AI):
    “Based on this design and simulation session: [paste summary of design brief, model choices, simulation results, and decisions made]. Write a structured engineering design note covering: (1) Design intent and requirements, (2) Key modelling decisions and rationale, (3) Simulation summary and findings, (4) Design changes implemented and why, (5) Open items and recommended next steps. Format for inclusion in a technical design review package.”
    Keywords active: prompt-to-simulation workflow · AI-driven engineering pipeline · AI simulation workflow

    Going Further: The Surrogate-Driven Design Loop

    Once you have the basic five-stage pipeline working, the next level is the surrogate-driven design loop. This is where the AI pipeline for CAD and simulation becomes genuinely autonomous in the optimisation stage, running tens or hundreds of design variants without human intervention between each one.

    What a Surrogate-Driven Loop Actually Is

    A surrogate model is a lightweight AI trained on your simulation results. Instead of running the full solver for every new design variant, the surrogate predicts the outcome in milliseconds. You explore the parameter space, wall thickness, fillet radius, hole placement, across 50 or 100 points, then run full-fidelity AI-powered CAE simulations only on the most promising candidates.

    Research published on arXiv (July 20251) demonstrated that LLMs can convert natural-language descriptions into valid CAD command sequences, essentially ‘prompt-to-feature-tree.’ When combined with surrogate-speed predictions, this creates a prompt-to-simulation workflow that is genuinely new, not just faster, but architecturally different from any previous engineering process.

    Practical Surrogate Loop Using Prompts

    1. Define your parameter space with a prompt: ‘I want to optimise a bracket for minimum weight with a safety factor ≥ 3. Variables: wall thickness 3–8mm, fillet radius 2–6mm, rib height 0–12mm. Generate a 25-point design of experiments (DOE) table spanning these ranges.’
    2. Run initial simulations: Feed the DOE table into your Ansys SimAI pipeline or SimScale. Run all 25 variants, this takes hours, not days, with AI-accelerated solvers.
    3. Build the surrogate: Use the 25 results to train a lightweight surrogate. Tools like Altair HyperWorks and Monolith AI handle this automatically. Your surrogate-driven design loop is now active.
    4. Explore with prompts: Ask Claude: ‘Based on these surrogate predictions, which 3 design points offer the best weight-to-safety-factor trade-off? What would happen if I increased the rib height by 2mm at those points?’ Use AI interpretation to guide the next round.
    5. Validate the winner: Run one full AI-powered CAE simulation on your selected design. Document with Stage 5 prompt. Pipeline complete.
    Surrogate-driven design loop AI pipeline for CAD simulation prompt-based optimisation mechanical engineering

    The Tool Stack That Powers This Pipeline

    You don’t need all of these tools on day one. Build the pipeline incrementally, starting with the prompt layer and adding specialist tools as your team grows into them. Here’s how the stack fits together for a complete AI-driven engineering pipeline:

    Pipeline StageTool(s)AI RolePrompt Use
    Stage 1, BriefClaude AILLM for engineering designRequirements → structured brief
    Stage 2, CADZoo / AdamCAD / SolidWorksZoo text-to-CAD pipelineBrief → geometry prompt
    Stage 3, Sim SetupSimScale AI / AnsysAnsys SimAI pipelineBrief + model → boundary conditions
    Stage 4, InterpretClaude AIAI-powered design validationResults → engineering decisions
    Stage 5, DocsClaude AIprompt-to-simulation workflowSession → design note
    Optimisation LoopAltair / Monolith AIsurrogate-driven design loopDOE → surrogate → prompt queries

    A note on tool choice: Claude AI engineering prompts are the unifying thread across all five stages. Claude handles design briefs, prompt refinement, results interpretation, and documentation, making it the single most versatile tool in the AI CAD pipeline. Specialist tools (Zoo for geometry, SimScale or Ansys for physics) handle what Claude can’t: actual geometry generation and physics solving. Together, they form a complete automated simulation pipeline.

    Making the Pipeline Stick: Practical Guidance for Engineering Teams

    An AI pipeline for CAD and simulation is only valuable if it actually gets used. Here’s what separates teams who build a lasting AI-driven engineering pipeline from those who run one project and revert to old habits.

    Build a Prompt Library, Not Just Skills

    Individual prompt skills don’t scale. What scales is a shared prompt library, a documented set of tested, refined prompts for each stage of the prompt-based CAD workflow. Every time someone writes a prompt that produces an excellent output, that prompt goes into the library. Within six months, the library becomes the team’s most valuable AI asset.

    Organise it by stage and part type: Stage 1 briefs for brackets, housings, and pressure vessels. Stage 3 AI prompts for FEA and simulation for static structural, modal, and thermal studies. The prompt-to-simulation workflow becomes systematic, not tribal.

    Start With One Bottleneck

    Don’t try to deploy all five stages at once. Identify your team’s single biggest time sink, typically Stage 3 (simulation setup) or Stage 5 (documentation), and build the pipeline around that first. A team that reduces CAD to FEA automation setup time by 60% on one project type will have all the internal buy-in needed to expand the pipeline further.

    AI pipeline CAD simulation prompt template card annotated Stage 3 FEA setup engineering 2026

    Validate Ruthlessly at Every Stage

    The AI simulation workflow must include validation checkpoints. Every Stage 3 setup should be reviewed against a checklist before the solver runs. Every Stage 4 interpretation should be confirmed by a qualified engineer before becoming a design decision. AI-powered design validation accelerates the process, it doesn’t replace the judgement that keeps your products safe.

    Use the Surrogate Loop for Design Families, Not One-Offs

    The surrogate-driven design loop is most powerful when applied to repeating design families, a family of brackets, a set of housing geometries, a series of pressure vessel variants. Building one surrogate for a design family and reusing it across multiple projects multiplies the ROI dramatically. The first project absorbs the setup cost; every subsequent project runs on near-instant predictions.

    What an Excellent AI Pipeline Looks Like in Practice

    Let’s make this concrete. Below is how a complete CAD simulation using prompts session plays out for a real engineering task, designing and validating a structural mounting bracket, using the five-stage pipeline.

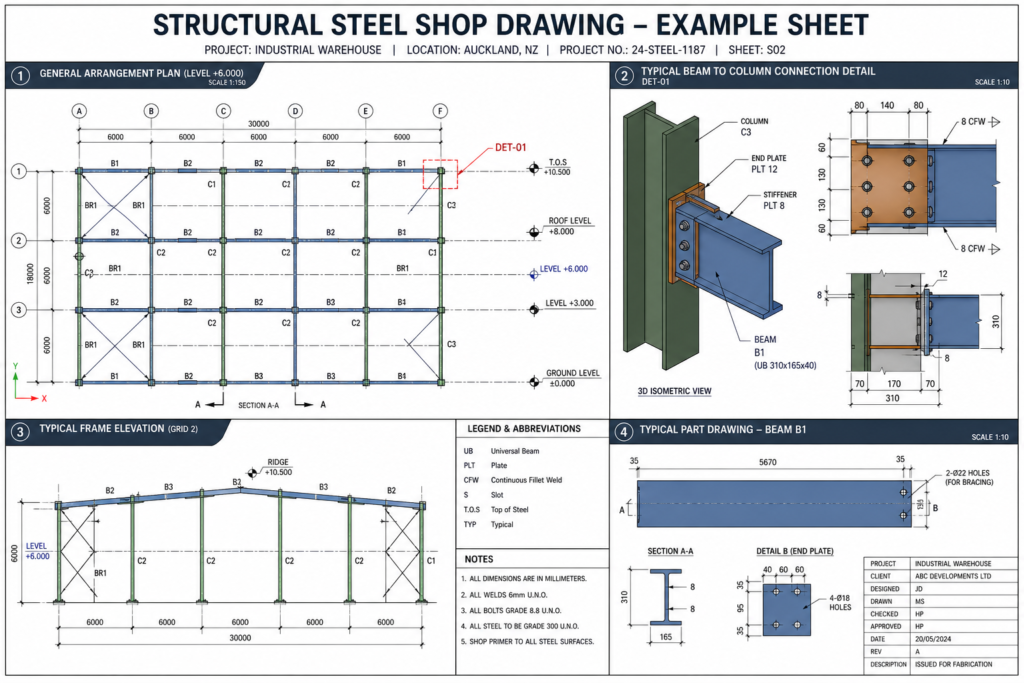
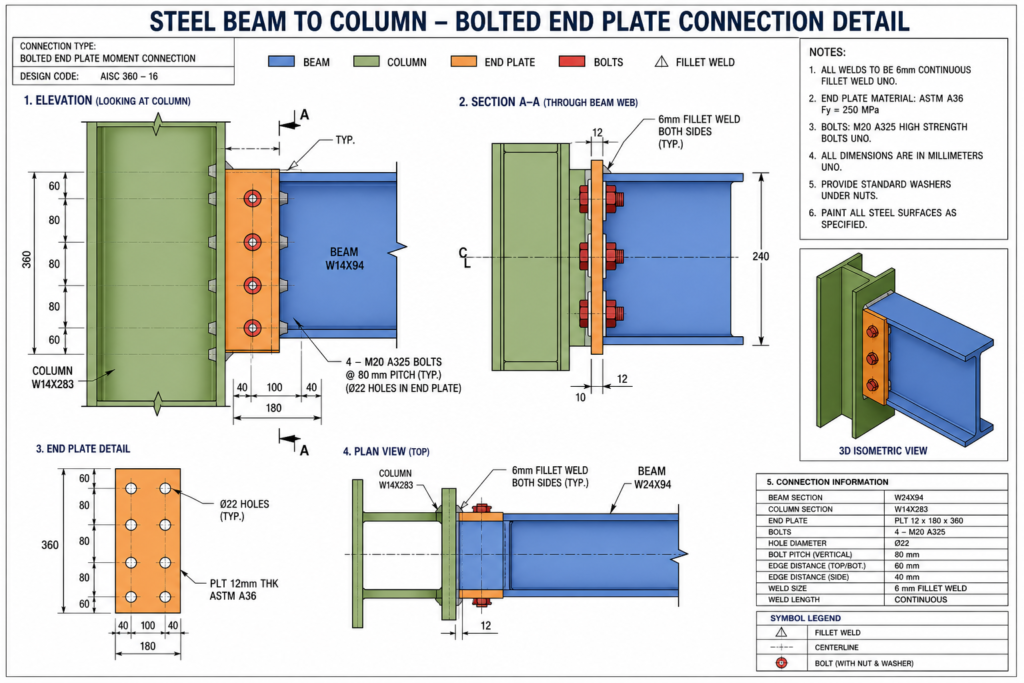
    Complete Pipeline Example: Steel Mounting Bracket

    Part: Steel mounting bracket for industrial conveyor motor (2kN steady-state + 500N peak dynamic load)

    Material: S275 structural steel, CNC machined

    Standard: ISO 2768 medium tolerance, safety factor ≥ 3

    Stage 1 prompt:

    “You are a senior mechanical engineer. I need to design a CNC steel mounting bracket for a 45kg conveyor motor. Loads: 2kN static vertical, 500N horizontal dynamic. Material: S275 steel, 5mm minimum wall. Fixed to machine frame via 4 × M10 bolts. ISO 2768 medium. Output a structured brief with critical dimensions, failure modes to simulate, and recommended FEA boundary conditions.”

    What Claude returns:

    A fully structured design brief: 3 critical geometry dimensions with recommended ranges, 4 failure modes ranked by likelihood, meshing guidance, boundary condition checklist, and a FEA load case matrix, ready to use as the Stage 2 and Stage 3 inputs.

    Stage 4 interpretation prompt (after FEA run):

    “Max von Mises: 187 MPa at inside fillet radius on primary leg. S275 yield: 275 MPa. Safety factor: 1.47. This fails my ≥3 SF requirement. Displacement at motor mount: 0.8mm. What is driving the stress, fillet radius or wall thickness? What is the minimum wall change to meet SF ≥ 3?”

    Claude identifies the fillet radius as the primary driver, recommends increasing the fillet from 3mm to 8mm as the highest-impact change (reducing peak stress 35–40% based on standard stress concentration data), and suggests a secondary wall increase from 5mm to 6mm as insurance. Total time for Stage 4: 4 minutes.

    Conclusion: Prompts Are the Infrastructure of the Modern Engineering Pipeline

    Building an AI pipeline for CAD and simulation isn’t about replacing engineering expertise, it’s about giving that expertise a faster, more connected environment to work in.

    The five-stage framework covered in this guide, from structured design brief through CAD simulation using prompts, FEA setup with AI prompts for FEA and simulation, results interpretation, and automated documentation, is not a future vision. It’s a working system that engineering teams are deploying today.

    What separates the teams getting the most from this approach is discipline in the prompt-based CAD workflow: specific inputs, clear output requirements at every stage, and a shared prompt library that compounds in value over time. The AI-driven engineering pipeline rewards consistency and specificity.

    Start with one stage. Build the brief prompt first, it’s the cheapest, fastest change and it improves the quality of every downstream stage immediately. Add Stage 3 automated simulation pipeline prompts next. Within a month, your team will have the bones of a full AI simulation workflow that is genuinely faster, more documented, and more repeatable than anything you were doing before.

    Ready to Build Your AI Engineering Pipeline?
    At Simutecra Engineering Services, we design and implement AI-driven CAD and simulation pipelines for mechanical engineering teams, from prompt strategy and tool integration to FEA automation and digital validation.
    We bring the engineering expertise and the AI know-how so your team can focus on building better products. Reach out to us today, www.simutecra.com
    Let’s engineer the future together.

    Frequently Asked Questions

    What is an AI pipeline for CAD and simulation?

    An AI pipeline for CAD and simulation is a connected sequence of AI tools and structured prompts that carries an engineering project from concept design through CAD modelling, simulation setup, results interpretation, and documentation, without the manual handoffs that slow traditional workflows down. Each stage feeds clean, structured output into the next using a prompt-based CAD workflow, so information never gets lost in the gaps between tools. The result is a faster, more consistent, and better-documented AI-driven engineering pipeline.

    Do I need specialist simulation knowledge to use this pipeline?

    Not to get started, but you do need it to validate the outputs. The pipeline is designed so that AI prompts for FEA and simulation guide setup and interpretation, lowering the barrier for engineers who aren’t simulation specialists. But AI doesn’t replace engineering judgement. Every stage includes a validation step that requires an engineer to confirm the setup is physically sensible before proceeding. The automated simulation pipeline is faster because AI handles the repetitive parts, not because engineers have checked out.

    What is the best way to start building an AI CAD simulation pipeline?

    Start with Stage 1, the design brief prompt. It requires no new software, produces immediate value (a structured brief is better than an informal one in any workflow), and forces the kind of requirement clarity that improves every downstream stage. Use Claude AI engineering prompts to refine your brief format over 3–5 projects. Then add Stage 3, CAD to FEA automation prompts, once you have a feel for how structured AI outputs change the quality of your simulation setup. Build the pipeline stage by stage, not all at once.

    How does a surrogate-driven design loop work with AI prompts?

    A surrogate-driven design loop starts with a DOE (design of experiments) table, which you can generate with a prompt. You run the DOE points through high-fidelity simulation, train a lightweight surrogate model on the results, then use prompts to query the surrogate for engineering insights: which design points offer the best trade-off, what happens if you change a parameter, which candidates warrant full-fidelity validation. The surrogate handles prediction speed; the prompt-to-simulation workflow handles interpretation and decision-making. Together they make parametric optimisation practical for projects that would previously have required a dedicated optimisation specialist.

    Can this pipeline be used for CFD as well as FEA?

    Yes. The five-stage structure applies to any simulation type. For CFD, the Stage 1 brief captures flow conditions, fluid properties, and performance targets instead of structural loads. The Stage 3 AI prompts for FEA and simulation address mesh density at boundary layers, turbulence model selection, and convergence criteria rather than contact definitions. The AI simulation workflow is physics-agnostic, the prompt structure adapts to whatever physics your project requires.

    How do I make sure AI pipeline outputs are trustworthy enough for production use?

    Trustworthiness comes from validation discipline, not from the AI itself. Every stage should have a review checkpoint: the Stage 1 brief should be signed off by the lead engineer before geometry work begins; Stage 3 simulation setup should be checked against a standard boundary conditions checklist before the solver runs; Stage 4 interpretation should be confirmed by a qualified engineer before it drives a design decision. AI-powered design validation accelerates the process, the review checkpoints ensure the AI-driven engineering pipeline output meets the same engineering standards as any manually produced result.


    For peer-reviewed research on LLMs for generative CAD automation and prompt engineering for design and simulation workflows, see: Generative AI for CAD Automation: Leveraging LLMs for 3D Modelling, arXiv:2508.00843 (2025)  (Peer-reviewed research, arXiv, highly authoritative EE

    1. Generative AI for CAD Automation: Leveraging LLMs for 3D Modelling, arXiv:2508.00843 (2025) ↩︎
  • AI Workflow in Mechanical Engineering: From Design to Simulation

    AI Workflow in Mechanical Engineering: From Design to Simulation

    Introduction: Why the Old Engineering Workflow Is No Longer Enough

    For decades, the mechanical engineering workflow looked the same: sketch an idea, build a CAD model, hand it to a simulation specialist, wait days for results, fix errors, and repeat. It worked, but it was slow, expensive, and often caught mistakes far too late.

    In 2026, something fundamental has changed. AI workflow in mechanical engineering is replacing that slow, linear process with something faster, smarter, and more connected, from the first concept sketch all the way through simulation and validation.

    Engineers at companies like BMW, Hyundai, and Airbus are already using AI-driven design simulation to cut prototype cycles by 40–60%. Teams that once needed specialist CAE analysts to run FEA studies are now letting AI FEA automation handle the setup, meshing, and post-processing, while their engineers focus on the decisions that actually matter.

    Whether you’re a mechanical engineer, a product designer, or a team lead looking to modernise your processes, this guide will show you exactly how AI workflow in mechanical engineering works, from the first design stage to final simulation validation, and which tools and techniques will deliver real results.

    Quick Answer, What Is AI Workflow in Mechanical Engineering?
    AI workflow in mechanical engineering refers to the use of artificial intelligence tools, including generative design AI, AI FEA automation, and AI-driven design simulation, to automate, accelerate, and optimise each stage of the engineering process, from concept design through CAD modelling, structural analysis, CFD, and digital validation. It replaces slow, manual sequences with AI-assisted design and simulation workflow pipelines that give engineers faster feedback, fewer errors, and more design options.
    40-60%Reduction in design cycle time reported by companies using generative design AI and AI-driven simulation (Autodesk, PTC 20251)
    $17.97BGlobal simulation software market size in 2025, growing at 12.1% CAGR, AI is the primary driver (CAE Assistant, 2025)
    10–100×Speed increase for 3D physics performance predictions using Ansys SimAI vs traditional FEA solvers

    What Does an AI Workflow in Mechanical Engineering Actually Look Like?

    Before diving into the tools and techniques, it helps to understand how an AI workflow in mechanical engineering is structured, and how it differs from a traditional process.

    In a traditional workflow, each stage is isolated: a designer creates the CAD model, passes it to a simulation analyst, who sets up the study, runs it overnight, and reports back. Then the designer revises, and the cycle repeats. It’s slow, siloed, and often means simulations only happen at the end, when changes are most expensive.

    An AI CAD workflow 2025 breaks down those silos. AI mechanical design tools provide real-time feedback during modelling. AI-driven design simulation runs alongside the design, not after it. AI engineering tools automate the repetitive parts, meshing, post-processing, documentation, so engineers spend their time on judgement and innovation.

    The 5 Stages of an AI-Powered Engineering Workflow

    • Stage 1 Conceptual Design: AI generates and evaluates multiple design concepts based on requirements. Generative design AI tools like Autodesk Fusion propose geometry optimised for weight, strength, and manufacturability.
    • Stage 2 CAD Modelling: AI mechanical design assistants (including Claude AI for engineering) accelerate modelling, write scripts, generate parameters, and check design logic in real time.
    • Stage 3 Simulation Setup: AI FEA automation handles meshing, boundary conditions, material assignment, and solver configuration, tasks that once took specialist hours.
    • Stage 4 Analysis & Optimisation: AI-powered CAE tools run parametric studies, predict failure modes, and recommend design changes, with surrogate model engineering delivering results in seconds.
    • Stage 5 Validation & Documentation: Digital twin AI enables real-time comparison between simulation and physical test data. AI generates technical reports and documentation automatically.

    Stage 1–2: AI in the Design Phase, From Concept to CAD

    The design phase is where AI workflow in mechanical engineering delivers its most immediate, visible impact. Let’s walk through what’s possible today.

    Generative Design AI, More Options, Less Manual Work

    Generative design AI doesn’t just help you draw a part, it proposes the part. You define the constraints: applied loads, fixed mounting points, material choices, and weight targets. The AI generates dozens of optimised geometry variations, each meeting your requirements in a different way.

    Tools like Autodesk Fusion generative design and PTC Creo AI have made this mainstream. Engineers report 40–60% reductions in design cycle time and lighter, stronger components that human designers rarely arrive at intuitively.

    This is AI design optimisation working at its most powerful, the AI explores a design space that would take months to map manually, and does it in hours.

    AI-Assisted CAD Modelling, Smarter, Faster, Error-Free

    Beyond generative design, AI-assisted design and simulation workflow tools are changing how individual engineers model parts day to day. Claude AI for engineering, used alongside CAD platforms, can write AutoLISP scripts, generate parametric feature lists, check design logic, and produce technical documentation in minutes.

    SolidWorks AURA, Onshape AI Advisor, and MecAgent all operate directly inside CAD environments, offering real-time suggestions, automating constraints, and flagging potential issues before they become simulation failures. This is AI CAD workflow 2025 in daily practice, not a future concept, but a working reality.

    Example AI Prompt for Engineering Design Brief (Use with Claude):
    “You are a senior mechanical engineer. I am designing an aluminium bracket that must support 2kN downward load with a 3× safety factor, mounted to a steel frame with 4 × M8 bolts. Wall thickness must be 4–6mm. Suggest key design features, critical dimensions, and potential failure modes I should simulate. Format as a structured engineering brief.”

    Result: Claude returns a complete design brief with dimensions, failure mode analysis, and simulation priority list, ready to use as your CAD and FEA starting point.

    How to Use AI for Mechanical Engineering Simulation | Stage 3 to 4

    Simulation has historically been the biggest bottleneck in product development. Complex AI tools for FEA and CFD studies can take hours or days to set up and run. AI simulation changes this dramatically.

    AI FEA Automation, End the Setup Bottleneck

    AI FEA automation tackles the two biggest problems in structural analysis: setup time and solve time. On the setup side, AI tools handle meshing, contact definitions, boundary conditions, and material assignment automatically, tasks that once required a specialist engineer and several hours. On the solve side, surrogate model engineering, where a machine learning model is trained on previous simulation data, delivers near-instant predictions instead of waiting for the full solver to run.

    Carnegie Mellon University’s TAG U-NET (2025) demonstrated that AI can predict stress and deformation fields directly from CAD geometry, replacing costly FEA iterations in early design stages with real-time feedback. This is AI simulation engineering 2025 at the research frontier, and it’s reaching commercial tools rapidly.

    AI CFD Optimisation, Faster Fluid Dynamics

    Computational Fluid Dynamics (CFD) has always been the most computationally expensive simulation type, fine meshes, long solve times, massive compute bills. AI-powered CAE tools like SimScale and Ansys SimAI are changing that equation by using machine learning to predict flow behaviour based on geometry patterns learned from thousands of previous simulations.

    The result: AI tools for FEA and CFD can now run parametric CFD sweeps, varying inlet velocity, geometry, or boundary conditions, in a fraction of the traditional time. Convion’s team at HD Hyundai used this approach to solve a complex hydrogen ejector pump optimisation problem that would have taken months with traditional CFD, completing it in weeks.

    Surrogate Models and Physics-Informed Neural Networks

    The cutting edge of AI-driven design simulation involves physics-informed neural networks (PINNs) and surrogate models. A surrogate model engineering approach trains a lightweight AI on high-fidelity simulation data, then uses that trained model to predict results for new design variants in milliseconds, without running the full solver.

    Platforms like Ansys SimAI, Altair HyperWorks AI, and Siemens NX are all integrating this capability. The practical result: engineers can explore 50–100 design variants per session instead of 3–5. That’s the AI design optimisation multiplier effect.

    Digital Twin AI: Closing the Loop Between Virtual and Physical

    Digital twin AI takes simulation one step further. A digital twin is a live, continuously updated simulation model of a physical product or system. AI processes real-world sensor data from the physical asset and updates the simulation model in real time, enabling predictive maintenance, performance monitoring, and design validation against actual operating conditions.

    For mechanical engineering teams, digital twin AI means your simulation doesn’t end when the product ships. It becomes an ongoing engineering resource that gets smarter with every operating hour, a critical capability in industries like aerospace, energy, and industrial machinery.

    AI workflow in mechanical engineering 5-stage design to simulation pipeline 2026 by simutecra

    Best AI Tools for Mechanical Engineers 2026 Complete Comparison

    Here is a clear breakdown of the best AI tools for mechanical engineers 2026 across the full workflow, from design to simulation.

    AI ToolWorkflow StageKey AI CapabilityBest For
    Autodesk Fusion generative designDesignGenerative design, topology optimisation, cloud CAMFull product development teams
    PTC Creo AIDesign + SimAI generative design, real-time simulation, thermal physicsComplex mechanical systems
    Claude AI for engineeringDesign + DocsPrompt engineering, scripts, design briefs, FEA setup notesAll engineers, any CAD platform
    Ansys SimAISimulationAI-powered CAE, 3D physics predictions 10–100× fasterFEA/CFD speed optimisation
    SimScale AISimulationCloud-native AI CFD and FEA, guided simulation setupTeams without specialist CAE
    Altair HyperWorksSimulationAI surrogate models, topology optimisation AI, auto-meshingOptimisation-heavy workflows
    Siemens NX / TeamcenterPLM + SimDigital twin AI, AI knowledge management, PLM automationLarge engineering organisations
    SOLIDWORKS AURACADContextual AI suggestions, automated constraints, feature recognitionSolidWorks daily users

    Step-by-Step: Building Your AI-Assisted Design and Simulation Workflow

    Here is a practical framework for implementing AI workflow in mechanical engineering, whether you’re starting from scratch or upgrading an existing process. This is the AI-assisted design and simulation workflow used by leading engineering teams today.

    1. Define your design requirements clearly. Write a structured requirements document. Use Claude AI for engineering to help: describe your part’s function, loads, materials, manufacturing method, and applicable standards. A clear requirements document is the foundation of any successful AI-driven design simulation workflow.
    2. Generate design concepts with AI. Feed your requirements into a generative design AI tool. Let Autodesk Fusion generative design or PTC Creo AI propose geometry options. Review 5–10 variants against your requirements before committing to one direction.
    3. Build and refine your CAD model. Use your chosen CAD platform with AI assistance. Write scripts, check parameters, and generate documentation with Claude AI for engineering. This is your AI CAD workflow 2025 in action.
    4. Set up simulation with AI automation. Import your model into SimScale AI or Ansys. Let AI FEA automation handle meshing, contact definitions, and boundary conditions. Validate the setup with a quick sanity check before running. Explore more on this: Prompt Engineering in Mechanical Engineering
    5. Run parametric studies, not single runs. Use AI tools for FEA and CFD to run sweeps of key parameters, wall thickness, fillet radius, load magnitude, in parallel. Surrogate model engineering makes this practical even on modest hardware.
    6. Interpret results with AI assistance. Ask Claude AI for engineering to help interpret your simulation output. Describe the results and ask: ‘What does this stress concentration indicate? What design changes should I prioritise?’ This turns AI simulation results into actionable engineering decisions.
    7. Connect to your digital twin. For products that will be monitored in service, connect your validated simulation model to your digital twin AI platform. This closes the loop between virtual AI-driven design simulation and real-world performance.
    AI-assisted design and simulation workflow vs traditional mechanical engineering process comparison by Simutecra

    Common Mistakes Teams Make When Adopting AI Engineering Workflows

    Adopting AI engineering tools isn’t just a technology decision, it’s a process change. These are the mistakes that slow teams down, and how to avoid them.

    Mistake 1: Starting Too Big
    Trying to overhaul the entire AI workflow in mechanical engineering overnight creates chaos. Start with one bottleneck, like AI FEA automation for a single part family, prove the value, then expand.
    Mistake 2: Poor Data Quality Going In
    Surrogate model engineering and AI simulation tools are only as good as the data they’re trained on. Messy, inconsistent, or incomplete simulation data produces unreliable AI predictions. Clean your data first.
    Mistake 3: Treating AI as a Replacement, Not an Augmentation
    AI doesn’t replace engineering judgement, it amplifies it. AI-powered CAE tools accelerate simulation but still require an engineer to validate results, interpret failure modes, and make design decisions. Engineers who expect AI to ‘just solve it’ are consistently disappointed.
    Mistake 4: Skipping Prompt Engineering for AI Tools
    Whether you’re using Claude AI for engineering or writing prompts for a generative design AI tool, vague inputs give vague outputs. Learning to write precise, structured prompts is the single biggest lever on the quality of your AI-assisted design and simulation workflow output.
    Mistake 5: Ignoring the Digital Twin Layer
    Teams that stop at simulation miss the compounding value of digital twin AI. Connecting your validated models to real-world operational data turns a one-off project into a continuously improving engineering asset.

    Pro Tips: Getting Expert Results from AI Engineering Workflows

    Expert Tips for AI Workflow in Mechanical Engineering

    • Build a simulation-first culture: Use AI FEA automation to make simulation fast enough that it happens at every design stage, not just at the end. This is the hallmark of teams with mature AI workflow in mechanical engineering practices.
    • Layer Claude with specialist tools: Claude AI for engineering is your briefing, documentation, and prompt refinement layer. Specialist tools like Ansys or SimScale handle the physics. Using both together creates a complete AI-assisted design and simulation workflow.
    • Use surrogate models for DOE: Design of Experiments (DOE) with surrogate model engineering is 10–100× faster than running full simulations at every point. Build the surrogate, sweep the parameter space, then validate only the top candidates with high-fidelity AI simulation.
    • Mandate prompt engineering training: Every engineer using AI engineering tools should understand how to write effective prompts. Even a half-day training session on structured prompt writing for AI-driven design simulation delivers immediate, measurable productivity gains.
    • Set AI simulation guardrails: Establish validation checklists for AI-powered CAE outputs. Even when AI FEA automation handles the setup, a 5-point engineer review checklist catches the errors AI tools miss, material assignments, unit inconsistencies, boundary condition oversights.
    • Track your AI ROI: Measure the time saved per simulation cycle before and after introducing AI tools for FEA and CFD. Concrete data builds internal buy-in and justifies investment in more capable platforms.
    AI workflow mechanical engineering before and after KPI comparison FEA simulation time savings 2026

    Conclusion: The Engineers Who Adopt This Now Will Lead Their Industries

    AI workflow in mechanical engineering is not coming, it’s here. The engineers and teams who are building AI-assisted design and simulation workflow practices today are already seeing 40–60% faster design cycles, more design options explored, fewer late-stage surprises, and better-performing products.

    The full stack, generative design AI for concept, AI CAD workflow 2025 for modelling, AI FEA automation and AI tools for FEA and CFD for analysis, and digital twin AI for validation, is available, proven, and accessible right now.

    The only question is where you start. Our recommendation: pick one bottleneck in your current workflow, introduce one AI engineering tools solution, measure the result, and build from there. The teams who start small and iterate fast are the ones who build the most effective AI-driven design simulation pipelines.

    Frequently Asked Questions

    Q1. What is AI workflow in mechanical engineering?

    AI workflow in mechanical engineering refers to using artificial intelligence tools throughout the entire engineering process, from generative design AI in the concept phase, through AI FEA automation and AI tools for FEA and CFD in simulation, to digital twin AI for post-deployment validation. It replaces slow, manual, siloed processes with connected, intelligent pipelines that give engineers faster feedback, more design options, and fewer late-stage errors. In 2025, this is the defining capability separating high-performing engineering teams from the rest.

    Q2. How does AI automation improve FEA simulations?

    AI FEA automation improves structural simulations in two key ways. First, it automates the most time-consuming setup tasks: meshing, boundary condition application, contact surface definition, and material assignment, reducing specialist setup time from hours to minutes. Second, surrogate model engineering trains a machine learning model on existing simulation data to deliver near-instant predictions for new design variants, cutting solve time from hours to seconds. Tools like Ansys SimAI can predict 3D physics performance 10–100× faster than traditional solvers.

    Q3. What are the best AI tools for mechanical engineers in 2025?

    The best AI tools for mechanical engineers 2025 cover every workflow stage. For design: Autodesk Fusion generative design and PTC Creo AI. For simulation: Ansys SimAI and SimScale AI for AI tools for FEA and CFD. For documentation, scripting, and AI engineering briefs: Claude AI for engineering. For optimisation loops: Altair HyperWorks with topology optimisation AI. The right combination depends on your workflow bottleneck.

    Q4. What is a surrogate model in engineering simulation?

    A surrogate model engineering approach involves training a lightweight machine learning model on high-fidelity simulation data (FEA or CFD results). Once trained, the surrogate can predict simulation outcomes for new design variants in milliseconds, rather than requiring the full physics solver to run. This makes it practical to explore 50–100 design variants per session. Physics-informed neural networks (PINNs) take this further by embedding physical laws directly into the model for higher accuracy across a wider parameter range.

    Q5. How is a digital twin different from a simulation model?

    A traditional simulation model is a static, one-time analysis. A digital twin AI is a live, continuously updated simulation that receives real-time data from the physical asset and updates its predictions accordingly. While simulation gives you a validated design, digital twin AI gives you ongoing operational insight, enabling predictive maintenance, performance monitoring, and in-service design improvements. It’s the final stage of a mature AI workflow in mechanical engineering pipeline.

    Q6. Can AI replace FEA engineers?

    No, and this is important. AI FEA automation handles the repetitive, time-consuming parts of simulation setup and processing. But engineering judgement, interpreting results, identifying failure modes, making design trade-offs, and validating AI outputs, still requires an experienced engineer. The correct framing is that AI engineering tools amplify what engineers can do, not replace them. Teams using AI-powered CAE tools are producing better work faster, with the same or smaller headcount.

    Q7. How do I start implementing an AI workflow in my engineering team?

    Start small and focused. Identify your single biggest workflow bottleneck, likely either FEA setup time or design iteration speed, and introduce one AI-assisted design and simulation workflow tool to address it. Measure before and after. Use Claude AI for engineering to accelerate documentation and prompt refinement from day one (it’s free to start). Once you’ve proven ROI on one stage, expand to the next. Full AI workflow in mechanical engineering adoption happens stage by stage, not all at once.

    1. Autodesk ↩︎
    This article cites verified 2025–2026 industry data from Ansys, SimScale, PTC, Autodesk, and peer-reviewed sources. All tool claims are sourced from official product pages and independent engineering publications. It is written for , and reviewed by, practising mechanical engineers.

  • Best Text-to-CAD Tools in 2026: From Prompt to 3D Model

    Best Text-to-CAD Tools in 2026: From Prompt to 3D Model

    Introduction:

    What if you could describe a product idea in plain English, and watch a 3D model appear in seconds?

    That’s no longer a fantasy. Text-to-CAD AI is here, it’s improving fast, and it’s already changing how engineers, product designers, and startups bring ideas to life.

    In 2026, a new generation of AI CAD tools can take a simple text description, like ‘a steel bracket 150mm x 80mm with four M8 bolt holes’, and generate a fully editable AI-generated 3D model in seconds. No CAD degree required. No hours of manual sketching. Just clear, well-written AI prompts for product design.

    This is the biggest shift in AI product design since CAD replaced the drafting table. And whether you’re an experienced mechanical engineer or a complete beginner, understanding text to CAD today puts you ahead of the curve.

    In this guide, you’ll learn exactly how text-to-CAD AI works, which tools are leading the space, how to write effective prompts, and what real engineers are doing with this technology right now.

    Quick Answer: What Is Text-to-CAD AI?
    Text-to-CAD AI is technology that converts plain-language text descriptions into editable 2D drawings or 3D CAD models using artificial intelligence. You type a description, including dimensions, materials, and design intent, and the AI generates a prompt to 3D model output, typically in standard formats like STEP, STL, DXF, or DWG. Leading AI CAD software 2026 platforms doing this include Zoo, AdamCAD, and integrations with Claude AI. The technology uses natural language to CAD processing to interpret your intent and produce geometry.

    What Is Text-to-CAD AI and Why Is It a Big Deal?

    Traditional CAD design is powerful, but it demands skill, time, and expensive software licences. Learning AutoCAD or SolidWorks takes months. Even experienced designers spend hours on routine geometry. That’s the gap text-to-CAD AI fills.

    At its core, text to CAD means using AI design tools to interpret your written description and generate usable geometry, just like telling a colleague what you need, but faster and available 24/7.

    Why Engineers and Designers Are Paying Attention

    • AI product design tools cut concept-to-prototype time dramatically, often from days to hours
    • You don’t need to be a CAD expert to produce a text to CAD model from description, beginners can generate real models
    • AI-generated 3D models export to industry-standard formats (STEP, STL, DWG) for immediate use
    • AI mechanical design workflows reduce repetitive drafting and free engineers for higher-value thinking
    • The technology is evolving from simple shapes to complex, physics-aware, parametric CAD automation, 2026 has seen major leaps

    Major players, Autodesk, PTC, Zoo, AdamCAD, are all investing heavily. According to PTC’s 2026 CAD trends report, manufacturers who adopt AI-assisted design today are seeing measurable advantages in quality, cost, and time-to-market. AI CAD software 2026 is not a future trend. It’s the current reality.

    How Does Text-to-CAD AI Work? (Plain English Explanation)

    This is the question most beginners ask first. Here’s a clear, simple breakdown.

    How Does Text-to-CAD AI Work, The Step-by-Step Process

    1. You type a description. Example: ‘AI prompts for product design‘: a cylindrical housing, 80mm diameter, 50mm tall, with a 20mm hole through the centre and M5 thread at the top opening.
    2. Natural language to CAD processing interprets your text, identifying dimensions, geometry type, features, and design intent.
    3. The AI generates a prompt to 3D model, either as a parametric B-Rep solid, a mesh, or a 2D DXF/DWG drawing, depending on the tool.
    4. You receive an AI-generated 3D model in a standard format: STEP, STL, OBJ, DXF, ready to import into SolidWorks, AutoCAD, Fusion 360, or your printer.
    5. You refine with follow-up prompts. No re-drawing from scratch: just describe the change and the AI updates the model.

    What Makes a Good Prompt for Text-to-CAD?

    The quality of your output depends entirely on the quality of your input. This is exactly why AI prompts for product design are a skill worth learning. Here’s what separates good prompts from great ones:

    • Include exact dimensions: ‘150mm x 80mm x 6mm’ not ‘medium-sized’
    • Specify the material or standard: ‘ABS plastic, 2mm wall’ or ‘stainless steel, ISO tolerance h7′
    • Name the output format: ‘Output as STEP file’ or ‘generate a DXF 2D drawing’
    • Describe the function: ‘designed for CNC machining’ or ‘3D print-ready, no overhangs’
    • Use one key feature per sentence: text-to-CAD AI handles stacked descriptions better when they’re broken into clear, separate statements
    Example: Text-to-CAD AI Prompt for a Mechanical Part
    “Design a rectangular aluminium mounting plate: 200mm x 120mm x 5mm thick. Add 4 x M6 counterbore holes (10mm diameter, 3mm deep) at each corner, inset 15mm from edges. Add a central slot 60mm x 20mm. Output as a STEP file, suitable for CNC machining.”
    Result: Tools like Zoo or AdamCAD produce a solid B-Rep model from this prompt in under 60 seconds.

    How Text-to-CAD AI Is Changing the Product Design Process

    The impact of text-to-CAD AI goes far beyond just ‘drawing faster.’ It’s fundamentally reshaping the AI-driven CAD workflow from end to end.

    1. From Idea to Prototype in Hours, Not Weeks

    Traditional product development moves from idea → sketch → CAD model → prototype → review, a cycle that can take days or weeks. With AI product design tools, the idea-to-model step collapses from hours to minutes. Designers iterate faster, test more ideas, and catch problems earlier.

    A founder at a hardware startup described using text to CAD to go from a napkin sketch to a prompt to 3D model in a single afternoon, something that previously required hiring a contract drafter for 3–5 days.

    2. Democratizing Engineering, No CAD Experience Needed

    One of the most transformative aspects of text-to-CAD AI is accessibility. Today, a product manager, a small business owner, or a student with zero CAD training can generate a usable AI-generated 3D model from a description. This is AI mechanical design becoming genuinely inclusive.

    Tools like Zoo and AdamCAD are specifically designed with this accessibility goal in mind. And when combined with Claude AI for CAD design, for prompt refinement, technical documentation, and design advice, even complete beginners produce professional-grade outputs.

    3. Accelerating Generative Design Exploration

    Senior engineers are using generative design AI to explore dozens of design variants at once. Instead of modelling each option manually, they describe the constraints, material, weight limit, load path, and let the AI generate multiple options for comparison.

    This is parametric CAD automation at its most powerful: the engineer focuses on decisions and trade-offs, while the AI handles the geometry. The AI-driven CAD workflow becomes a creative and analytical partnership, not just automation.

    4. Smarter Iteration, Text Edits Instead of Re-Draws

    With traditional CAD, changing a wall thickness means finding the right feature, modifying a sketch, and potentially fixing downstream errors. With text-to-CAD AI, you type: ‘Change the wall thickness to 8mm and add 2mm fillets on all internal edges.’ The model updates instantly.

    This natural language to CAD editing approach makes the tool feel less like software and more like a conversation, which is exactly the direction AI CAD software 2026 is heading.

    Text-to-CAD AI workflow vs traditional CAD product design process comparison 2026

    Best Text-to-CAD Tools for Engineers in 2026

    The best text-to-CAD tools for engineers in 2026 range from dedicated AI-powered CAD generation platforms to AI assistants that plug into your existing software. Here’s a clear comparison:

    ToolBest ForOutput FormatPriceSkill Level
    Zoo (zoo.dev)text-to-CAD AI mechanical prototyping, editable B-Rep modelsSTEP, STL, FBX, OBJFree / credit-basedAll levels
    SimuTecra Text-to-CADtext-to-CAD AI
    Free instant 2D parametric drawings (gears, flanges, brackets, plates)
    DXF, SVGFreeBeginner-friendly
    AdamCADAI-generated 3D models fast 2D/3D parametric outputSTL, OBJ, DXFFree trial / paidBeginner-friendly
    Claude AIClaude AI for CAD design: scripts, specs, docs, prompt refinementScripts, text, tablesFree / ProAll levels
    DraftAidAI-driven CAD workflow: auto-dimensioning 2D drawings from 3DDWG, DXF, PDFPaid plansIntermediate
    CADGPTAI CAD tools: AutoCAD scripts, LISP code, CAD Q&AScripts, codeFree trial / paidIntermediate
    Autodesk Fusion 360 AIgenerative design AI: topology optimisation, simulationNative F360, STEPSubscriptionProfessional

    For quick convert text to 3D CAD model free prototyping, Zoo and AdamCAD are excellent starting points, and for fast 2D parametric drawings like gears, flanges, and brackets, SimuTecra’s free Text-to-CAD tool generates a downloadable DXF or SVG in seconds, no signup required. For documentation, scripting, and design guidance, Claude AI for CAD design is the strongest pairing. For professional AI mechanical design with simulation, Autodesk Fusion 360’s generative design AI features are industry-leading.

    Best text-to-CAD AI tools 2026 Zoo AI model generation and Claude AI for CAD design side by side

    Step-by-Step: Using Text-to-CAD AI for Product Design (Practical Workflow)

    Here’s the exact workflow you can follow today to go from a product idea to a usable AI-generated 3D model: using a combination of text-to-CAD AI and Claude AI for CAD design.

    1. Define your design intent: Write 3–5 sentences describing what the part does, what material it needs, and how it will be made (3D printed, CNC, injection moulded). This is the foundation of all great AI prompts for product design.
    2. Refine your brief with Claude: Paste your description into Claude and ask: ‘I am designing [description]. What key dimensions, features, and constraints should I include in my prompt for a text-to-CAD AI tool?’ Claude will sharpen your brief.
    3. Generate your model: Take your refined prompt to Zoo, AdamCAD, or your chosen AI CAD software 2026. Enter the prompt and generate your text to CAD model from description.
    4. Review and iterate: Check the output against your requirements. Use follow-up prompts to adjust. The AI-driven CAD workflow is iterative, expect 2–4 rounds before the model is right.
    5. Export and integrate: Download the file in STEP, STL, or DXF format and import into SolidWorks, Fusion 360, or your slicer. Your AI product design output is ready for prototyping or manufacturing review.
    6. Document with Claude: Use Claude AI to generate your BOM, technical spec, or drawing notes from a description of the final design. This completes a full AI-driven CAD workflow from brief to documentation.

    Common Mistakes When Using Text-to-CAD AI (And How to Avoid Them)

    Even great technology gets misused. Here are the most common mistakes engineers and designers make with text-to-CAD AI, and the fixes:

    Mistake 1: Expecting One Prompt to Do Everything
    Text-to-CAD AI works best iteratively. Start with the main geometry, then add features in follow-up prompts. Trying to describe a complex assembly in one 200-word prompt usually results in garbled output.
    Mistake 2: Leaving Out Dimensions
    Make a bracket’ tells the AI nothing. Every good AI prompts for product design includes exact measurements, length, width, height, radius, thread size. Natural language to CAD requires specificity to produce accurate geometry.
    Mistake 3: Not Specifying the Output Format
    Want a STEP file for SolidWorks? A DXF for laser cutting? Say so explicitly. AI-generated 3D models come in multiple formats, the tool won’t guess which one you need.
    Mistake 4: Skipping Validation
    Always validate AI-powered CAD generation outputs before sending to manufacturing. Check critical dimensions, wall thicknesses, and fit tolerances. AI CAD tools are powerful assistants, but they don’t replace engineering judgment.
    Mistake 5: Ignoring Claude for Design Guidance
    Many users jump straight to geometry tools and skip the briefing step. Claude AI for CAD design is the perfect tool to refine your brief, check your design logic, and prepare better prompts before you generate. Skipping this step produces worse outputs.

    Pro Tips: Getting Expert Results from Text-to-CAD AI

    Expert Tips for Text-to-CAD AI in 2026

    • Layer your prompts: Generate the base shape first, then add features (holes, threads, fillets) in separate prompts. This mirrors how real parametric CAD automation works and produces cleaner geometry.
    • Use manufacturing method as context: ‘Designed for FDM 3D printing, no overhangs above 45 degrees’ immediately improves AI product design output quality.
    • Combine Claude + Zoo for maximum output: Use Claude AI for CAD design to write and refine your design brief, then paste it into Zoo or AdamCAD. This two-step approach is the AI-driven CAD workflow that experienced users swear by.
    • Reference existing standards: Adding ‘ISO 2768 medium tolerance’ or ‘DIN 912 socket head cap screw’ to your prompt lifts AI-generated 3D models to professional quality instantly.
    • Ask for design alternatives: Type ‘Give me three design variants for this part’ to unlock the full power of generative design AI thinking.
    • Save your best prompts: Build a prompt library for repeated part types, brackets, enclosures, flanges. This turns text-to-CAD AI from a one-off tool into a systematic design accelerator.
    • Push the boundaries with free tools: You can convert text to 3D CAD model free using Zoo’s free plan (1,205 credits/month) or AdamCAD’s free trial, If you just need a clean 2D DXF for a gear, flange, or bracket without any account setup, SimuTecra’s Text-to-CAD tool is free and runs entirely in-browser describe the part and export instantly. Enough to explore AI CAD software 2026 capabilities before committing to a paid plan.
    Text-to-CAD AI before and after, good vs bad AI prompts for product design output quality

    Benefits of Text-to-CAD AI: At a Glance

    BenefitTraditional CADWith Text-to-CAD AI
    Concept-to-model speedDays to weeksHours to minutes
    Skill requirementMonths of CAD trainingAI design tools, plain English
    Iteration speedSlow rebuild each changeFast natural language to CAD edits
    DocumentationManual, time-consumingAutomated with Claude AI for CAD design
    Design exploration1–2 options per sessionGenerative design AI: 5–10+ variants
    Cost (early stage)High (drafter/engineer hours)Low, convert text to 3D CAD model free

    For the latest testing data on best text-to-CAD tools for engineers, including hands-on results from seven platforms tested in 2026, see: 

    We Tested 7 Text-to-CAD Tools, Xometry Pro (xometry.pro) 

    Conclusion:

    Text-to-CAD AI is no longer experimental. In 2026, it is a practical, production-ready capability that is already saving engineers and designers hours every week, and it’s only getting better.

    Whether you’re a complete beginner wanting to convert text to 3D CAD model free, a product designer speeding up AI product design iteration, or an engineer building a smarter AI-driven CAD workflow, the tools and techniques you need are available right now.

    The key is combining the right AI CAD software 2026 with well-crafted AI prompts for product design. Use Claude AI for CAD design to refine your brief and your logic. Use Zoo, AdamCAD, or SimuTecra’s own Text-to-CAD tool for AI-powered CAD generation. And use generative design AI thinking to explore more options than you ever could manually.

    The designers who learn this skill now will be the ones leading their industries in two years.

    Frequently Asked Questions

    Q1. What is text-to-CAD AI and how does it work?

    Text-to-CAD AI is technology that converts plain-text descriptions into editable 2D or 3D CAD models using artificial intelligence and natural language to CAD processing. You type a description including dimensions, material, and output format. The AI interprets your intent and generates a prompt to 3D model output in formats like STEP, STL, or DXF. It works best with specific, detailed prompts.

    Q2. Can AI actually generate accurate CAD models from text?

    Yes, for simple to medium-complexity parts, AI-generated 3D models from platforms like Zoo and AdamCAD are accurate and export-ready. Results are best when AI prompts for product design include exact dimensions, material specs, and manufacturing context. Complex multi-part assemblies are still challenging, but single-component text-to-CAD AI is production-ready in 2026.

    Q3. What are the best text-to-CAD tools for engineers in 2026?

    The best text-to-CAD tools for engineers in 2026 include Zoo (best for mechanical prototyping with editable B-Rep models), AdamCAD (fast 2D/3D parametric output), CADGPT (AutoCAD scripts), and Claude AI for CAD design (design briefs, documentation, prompt refinement). For enterprise-level generative design AI, Autodesk Fusion 360 leads the market.

    Q4. Is there a way to convert text to 3D CAD model for free?

    Yes. You can convert text to 3D CAD model free using Zoo’s free plan (1,205 credits/month) or AdamCAD’s free trial. Claude AI also offers a free tier for AI prompts for product design, design guidance, and script generation. These free tiers are more than enough to explore text-to-CAD AI and test workflows before upgrading. For quick 2D engineering drawings (gears, flanges, brackets, plates), SimuTecra’s free Text-to-CAD tool is another option, no login, instant DXF/SVG export.

    Q5. How does text-to-CAD AI differ from generative design AI?

    Text-to-CAD AI converts a user’s text description into CAD geometry, you define the shape. Generative design AI (like Autodesk Fusion’s Generative Design) uses constraints (loads, materials, boundaries) to automatically optimise geometry, the AI proposes the shape. Both are part of the broader AI product design revolution, but they operate at different stages of the design process.

    Q6. Do I need CAD software experience to use text-to-CAD AI?

    No. Text-to-CAD AI tools are specifically designed to remove the technical barrier. You describe what you need in plain English, the AI design tools handle the geometry. That said, having basic knowledge of dimensions, materials, and manufacturing processes will dramatically improve the quality of your AI prompts for product design.

    Q7. How does Claude AI help with text-to-CAD and product design?

    Claude AI for CAD design works as a design intelligence layer alongside dedicated text-to-CAD AI geometry tools. Claude helps you refine your design brief, write better AI prompts for product design, generate technical documentation, perform design logic reviews, and write AutoCAD scripts. It’s the thinking partner that makes your AI-driven CAD workflow more precise and more productive.

  • Prompt Engineering for CAD Modeling: Write Better AI Prompts and Design Faster in 2026

    Prompt Engineering for CAD Modeling: Write Better AI Prompts and Design Faster in 2026

    The Skill Every CAD Engineer Needs Right Now

    You’ve probably heard about AI changing the engineering world. But here’s what most people don’t talk about: the quality of your results depends almost entirely on how you write your prompts.

    That’s what prompt engineering for CAD modeling is all about. It’s the skill of writing clear, specific instructions to an AI, like Claude, so it gives you exactly what you need for your CAD project, not a generic guess.

    Whether you’re working with AI prompts for CAD design in AutoCAD, generating geometry parameters in SolidWorks, or drafting technical specs, a well-written prompt is the difference between wasting 20 minutes and getting a perfect result in 30 seconds.

    This guide is for anyone using CAD AI tools today. Beginners, students, professionals, this one is for you.

    ⚡ Quick Answer
    Prompt engineering for CAD modeling means writing structured, specific instructions to an AI tool so it produces accurate CAD outputs, such as scripts, design parameters, technical documentation, or geometry calculations. A good AI prompt for CAD design includes: the part type, exact dimensions, material, software name (e.g. AutoCAD / SolidWorks), and desired output format. The better your prompt, the better your AI-assisted CAD workflow.

    What Is Prompt Engineering and Why Does It Matter for CAD?

    Prompt engineering is simply the art of writing good instructions for an AI. Think of it like this: when you search Google, you’ve learned to write better search queries over time. Prompt engineering is the same idea, but for AI systems like Claude, ChatGPT, or any other AI mechanical design assistant.

    In CAD modeling with AI, this matters enormously because:

    • A vague prompt gives a vague answer, useless for engineering work
    • A specific, structured prompt gives you working scripts, calculations, or design logic
    • The right natural language CAD commands unlock capabilities most engineers never discover
    • Good prompts turn a general AI into a focused AI CAD software assistant

    Here’s a simple example of the difference between a bad prompt and a great one:

    Weak Prompt:
    Create a part for me.”Result: Generic, unusable, requires 5 follow-up questions.
    Strong Prompt
    Write an AutoLISP script for AutoCAD that draws a steel bracket: 150mm x 80mm x 6mm wall thickness, with 4 x M8 bolt holes at 20mm from each corner. Output as a ready-to-run .lsp script.”Result: Working code, ready to paste and run.

    The 5 Elements of a Perfect AI Prompt for CAD Design

    After testing hundreds of AI prompts for CAD design, the best ones always include these five elements. Master these and your AI-assisted CAD workflow will transform overnight.

    Element 1: Role Definition

    Start your prompt with a role. This primes the AI to think like an expert. Example: “You are a senior mechanical engineer specializing in SolidWorks parametric design.” This simple step dramatically improves the precision of every Claude AI CAD modeling prompt you write.

    Element 2: Specific Context

    Tell the AI exactly what software, material, and constraints you’re working with. For best AI prompts for AutoCAD, always include: the AutoCAD version if relevant, the units (mm/inches), layer names, and drawing standards (ISO, ANSI, etc.).

    Element 3: Precise Dimensions and Parameters

    Never leave out numbers. Prompt engineering for CAD modeling fails most often when people say ‘make it big’ instead of ‘250mm x 180mm x 12mm.’ Always specify dimensions, tolerances, thread types, radii, and material grades.

    Element 4: Desired Output Format

    Tell the AI what you want back. Do you need an AutoLISP script? A table of parameters? A written specification? A step-by-step design plan? Specifying the output format is critical for CAD modeling with AI, otherwise the AI decides for you, and it often guesses wrong.

    Element 5: Constraints and Standards

    Include any real-world constraints: load limits, manufacturing method (CNC, 3D printing, casting), applicable standards (ISO 2768, ASME Y14.5), or client requirements. This is what separates a beginner prompt from a professional-grade AI prompt for mechanical drawing.

    Step-by-Step Guide: How to Write AI Prompts for SolidWorks, AutoCAD & More

    Let’s walk through the exact process for how to write AI prompts for SolidWorks, AutoCAD, and FreeCAD. The framework is the same for all three, only the software-specific details change.

    1. Open your AI tool (Claude at claude.ai, or your preferred platform) alongside your CAD software.
    2. Start with a role statement. Type: “You are an expert mechanical engineer working in [SolidWorks / AutoCAD / FreeCAD].”
    3. Add your context, project type, industry, drawing standard, and units.
    4. Describe the part or task in full detail, shape, dimensions, tolerances, material, and finish.
    5. Specify your output. ‘Give me a ready-to-run script,’ or ‘Give me a parameter table,’ or ‘Write the GD&T notes for this drawing.’
    6. Read the response carefully. If something is off, follow up: ‘Change the wall thickness to 8mm and add a 2mm fillet on all inside edges.’
    7. Test and apply. Paste scripts into your software. Validate the logic of any calculations.

    Real Prompt Example: AutoCAD AI Automation 2026

    Here is a full, working example of AutoCAD AI automation 2026 using Claude:

    💬 Full Prompt for AutoCAD (Copy & Use):“You are a senior AutoCAD drafter. Write an AutoLISP script that does the following: (1) Creates a new layer called STEEL_FRAME with color red. (2) Draws a rectangular frame 400mm x 250mm centered at 0,0. (3) Adds 4 circles of diameter 20mm at each corner, inset 25mm from each edge. (4) Adds the text FRAME-01 in the center at 10mm height. Output only the complete .lsp code with no explanation.”

    Result: Claude produces a clean, ready-to-run script in seconds. No syntax errors. No guessing.

    Real Prompt Example: How to Write AI Prompts for SolidWorks

    For how to write AI prompts for SolidWorks, the focus shifts from scripts to design parameters and feature logic:

    💬 Full Prompt for SolidWorks Parametric Design:“You are a SolidWorks expert. I am designing a plastic snap-fit enclosure for a PCB (120mm x 80mm). The enclosure must: use ABS plastic at 2mm wall thickness, have a snap-fit lid with 0.3mm interference fit, include 4 x M3 boss inserts at each PCB mounting corner, and meet IEC 60529 IP54 rating. List all the key parametric design features I need to model, with recommended dimensions for each feature

    Result: Claude returns a structured feature list with exact dimensions, ready to model directly in SolidWorks.

    Advanced Prompt Techniques: Generative CAD and Parametric Design with AI

    Once you have the basics down, these advanced techniques take your CAD AI tools usage to the next level.

    Chained Prompts for Complex Assemblies

    Instead of trying to do everything in one prompt, break complex assemblies into a chain. First prompt: overall dimensions and material. Second prompt: fastener and joint specifications. Third prompt: GD&T and tolerance stack-up. This approach is the backbone of serious generative CAD design workflows.

    Using AI for Parametric Design Reviews

    Describe your parametric design with AI intent, for example, a gear train where the module changes drive the entire assembly, and ask Claude to flag potential interference issues or suggest which parameters should be driven vs. driving. This kind of logic review catches problems before you even open SolidWorks.

    Text-to-CAD AI Workflows

    The frontier of text-to-CAD AI is moving fast. Tools like Autodesk’s AI features, combined with a well-engineered prompt from Claude, can now produce rough geometry from a text description. While full automation is still maturing, using natural language CAD commands to generate parameter sheets and design intent documents is production-ready right now.

    Iterative Refinement, The Power Move

    The best AI-assisted CAD workflow professionals use iteration as a core strategy. They start with a broad prompt, review the output, then ask the AI to refine, tighten, or expand specific sections. Each round gets them closer to the exact output they need, far faster than traditional trial and error.

    a perfect prompt engineering for CAD modeling workflow with AI tools

    Benefits of Prompt Engineering for CAD Modeling, By User Type

    User TypeBenefit from AI Prompts for CAD DesignTime Saved Per Week
    Engineering StudentsLearn CAD faster with AI explanations and instant feedback on prompts3–5 hrs
    Freelance DraftersAutomate documentation, scripts, and client specs using CAD modeling with AI5–8 hrs
    Mechanical EngineersSpeed up calculations, tolerance reviews, and GD&T using AI-assisted CAD workflow4–7 hrs
    CAD Managers / TeamsStandardize prompt templates across the team for AutoCAD AI automation 20268–12 hrs
    Non-Engineers / PMsUnderstand drawing specs and design intent with plain-English AI explanations2–3 hrs

    Common Mistakes in AI Prompt Engineering for CAD (And How to Fix Them)

    Even experienced engineers make these mistakes when they first start using AI prompts for CAD design. Avoid these and you’ll be ahead of 90% of users.

    Mistake 1: Using Generic Prompts
    ‘Make me a CAD design’ tells the AI nothing. You get nothing useful back. Prompt engineering for CAD modeling starts with specificity. Always include software, dimensions, material, and output type.
    Mistake 2: Skipping the Role Statement
    Skipping ‘You are a senior mechanical engineer…’ means you get a generalist answer. Always set the role first. This single habit transforms your Claude AI CAD modeling prompts from average to expert-level.
    Mistake 3: Not Specifying Units
    In engineering, mm and inches are worlds apart. Any AI prompt for mechanical drawing must include the unit system explicitly, metric (ISO), imperial (ANSI), or both. Never leave this to the AI to guess.
    Mistake 4: One-and-Done Prompts
    The biggest mistake in CAD modeling with AI is expecting a single prompt to do everything. The most productive workflows are iterative. Write a prompt, review the output, refine. Each iteration gets you closer to the perfect result.
    Mistake 5: Not Validating AI Output
    Whether it’s an AutoLISP script or a calculation table, always review AI output before applying it. AI CAD software assistance is powerful, but it’s not infallible. A quick sanity check takes 2 minutes and saves hours of rework.

    Pro Tips: Expert-Level Prompt Engineering for CAD Modeling

    Pro Tips from the Field

    • Build a Prompt Library: Save your best AI prompts for CAD design in a shared document. A team prompt library is the fastest route to consistent results.
    • Use the ‘Explain Your Reasoning’ Trick: Add ‘Explain each decision’ to your prompt. This turns any AI mechanical design assistant into a learning tool, you understand the engineering, not just get an answer.
    • Combine Claude with AutoCAD AI Automation: Use Claude to write and debug your AutoCAD AI automation 2026 scripts, then run them inside AutoCAD. Best of both worlds.
    • Reference Drawing Standards: Mention ISO 2768, ASME Y14.5, or DIN standards in your prompt. This lifts your output to professional quality automatically.
    • Unlock Generative CAD Design: For complex assemblies, ask Claude to propose multiple generative CAD design alternatives with trade-offs. You get options, not just one answer.
    • Parametric First: When working in SolidWorks or Inventor, always ask Claude to structure outputs as parametric design with AI recommendations, driven dimensions, relations, and design intent, not just static values.
    • Use Structured Output Requests: End every complex prompt with ‘Format your answer as a table / numbered list / .lsp script.’ Clear format requests are the single biggest upgrade you can make to any CAD modeling with AI workflow.
    Annotated example of prompt engineering for CAD modeling in Claude AI showing all 5 prompt elements

    For the latest research on AI-assisted design and generative CAD design developments, see Autodesk’s official AI research hub: 

    Conclusion:

    Prompt engineering for CAD modeling is not a nice-to-have skill in 2026, it’s the core skill that separates engineers who struggle with AI tools from those who use them to design faster, better, and smarter.

    You’ve now learned the five elements of a great AI prompt for CAD design, seen real working examples for both how to write AI prompts for SolidWorks and best AI prompts for AutoCAD, and picked up pro-level techniques for generative CAD design and parametric design with AI.

    The next step? Open Claude, write your first structured prompt, and see the results for yourself. Your AI-assisted CAD workflow starts today.

    Want the complete picture?
    Read our Pillar Guide: Prompt Engineering in Mechanical Engineering, Complete Guide the ultimate resource for using AI across every part of your engineering workflow.

    Frequently Asked Questions

    Q1. What is prompt engineering for CAD modeling?

    Prompt engineering for CAD modeling is the practice of writing structured, detailed instructions to an AI (like Claude) so it generates accurate CAD outputs, such as scripts, parameters, technical specs, or design logic. The more specific and well-structured your prompt, the better the output. It requires no coding, just clear, detailed writing about what you need.

    Q2. What are the best AI prompts for AutoCAD in 2026?

    The best AI prompts for AutoCAD always include: the software name (AutoCAD), the desired output (AutoLISP script / command sequence / macro), exact dimensions with units, layer specifications, and any drawing standards. Always add ‘Output only the ready-to-run code with no explanation’ for script requests. This is the core of AutoCAD AI automation 2026.

    Q3. How do I write AI prompts for SolidWorks?

    For how to write AI prompts for SolidWorks: start with a role statement (‘You are a SolidWorks expert’), then specify your part type, material, key dimensions, manufacturing method, and applicable standards. Ask for a parametric feature list or design intent document as your output. This structure works for any CAD modeling with AI platform.

    Q4. Is Claude AI good for CAD modeling prompts?

    Claude AI CAD modeling prompts work exceptionally well because Claude handles long, detailed technical instructions with high accuracy. It understands engineering terminology, material science, GD&T notation, and software-specific scripting. It also remembers context throughout a conversation, making it ideal for iterative AI-assisted CAD workflow sessions.

    Q5. What is generative CAD design and can AI help with it?

    Generative CAD design means using algorithms or AI to automatically generate design options based on goals and constraints, like minimizing weight while meeting load requirements. AI tools like Claude can help you define the parameters, explore trade-offs, and generate design intent documents that feed into software like Autodesk Fusion or SolidWorks Simulation.

    Q6. Do I need coding skills to use AI prompts for CAD design?

    No. AI prompts for CAD design require no coding knowledge. You write in plain English and the AI produces scripts, code, or calculations for you. If you want the output in a specific format (e.g. AutoLISP or a parameter table), just say so in your prompt. Natural language CAD commands via AI are accessible to complete beginners.

    Q7. How does text-to-CAD AI work alongside prompt engineering?

    Text-to-CAD AI tools take a text description and generate 3D geometry or 2D drawings directly. Prompt engineering for CAD modeling sits one layer upstream, it helps you write the right description to feed into these tools, or generates detailed parameter sheets and scripts when full text-to-CAD isn’t available. Together they form the most powerful AI CAD software workflow available in 2026.

  • Claude AI for CAD Drafting: The Smarter Way to Design Faster in 2026

    Claude AI for CAD Drafting: The Smarter Way to Design Faster in 2026

     Is CAD Drafting Taking Too Long?

    If you’ve ever spent hours drawing the same part over and over, writing technical notes, or searching for the right command in AutoCAD, you’re not alone.

    CAD drafting is powerful. But it’s also slow, repetitive, and frustrating, especially for beginners.

    That’s where Claude AI for CAD drafting comes in, a growing part of modern AI for CAD design workflows.

    Claude is an AI assistant made by Anthropic. It can help you write commands, generate design ideas, automate documentation, and even help you learn CAD faster, all through simple, plain-English conversation.

    You don’t need to be a tech expert. You don’t need to know coding. You just need to know what you want to build.

    Quick Answer
    Claude AI for CAD drafting means using Claude (an AI by Anthropic) to help you write CAD commands, generate design parameters, create technical documentation, and automate repetitive drawing tasks, all by typing simple prompts in plain English using natural language CAD commands.

    It works alongside tools like AutoCAD, SolidWorks, and FreeCAD to make your workflow faster and smarter as part of an AI CAD software ecosystem.

    What Is Claude AI and Why Should CAD Users Care?

    Claude is a large language model (LLM) built by Anthropic. Think of it as a very smart assistant that understands what you type and gives you helpful, detailed responses, making it one of the most practical AI CAD tools for engineers today.

    For CAD drafters, Claude is useful because:

    • It understands engineering language, tolerances, dimensions, material properties, GD&T
    • It can generate ready-to-use code scripts for AutoCAD (like AutoLISP or macros), supporting AutoCAD AI automation 2025
    • It explains complex design concepts in simple terms, helping with AI engineering design
    • It helps write professional technical documentation without starting from scratch using AI-assisted technical drawing
    • It suggests design improvements based on your description

    In short, Claude acts like a smart design partner sitting next to you, available 24/7, never tired, and always patient, enhancing your Claude AI mechanical design workflow.

    How Claude AI Helps With CAD Drafting, Practical Use Cases

    1. Generating AutoCAD Scripts and Macros

    One of the most time-saving things Claude can do is write AutoCAD scripts for you. Instead of spending an hour figuring out AutoLISP syntax, you just describe what you want using prompt engineering for designers.

    For example, you can type:

    💬 Example Prompt:
    “Write an AutoLISP script that draws a rectangle 200mm x 100mm at the origin and adds a center mark.”

    Claude will produce a working script. You paste it into AutoCAD and run it. Done.

    This works for batch renaming layers, setting up drawing templates, inserting title blocks, and much more, a core part of AI CAD tools for engineers.

    2. Creating Design Parameters and Calculations

    Let’s say you’re designing a steel bracket. You need to figure out wall thickness, load capacity, or material selection. Claude can help you reason through these decisions quickly, supporting AI engineering design workflows.

    Just describe your situation: the load, the material, the environment, and Claude will walk you through the engineering logic in simple steps.

    This is especially helpful for beginners who are still learning how to use Claude AI for CAD modeling.

    3. Writing Technical Documentation

    Every CAD project eventually needs documentation, drawing notes, revision histories, part descriptions, material call-outs.

    Claude can generate all of this from a short description. You tell it what the part does, and it writes clean, professional technical notes that you can paste right into your drawing, improving AI-assisted technical drawing efficiency.

    4. Learning CAD Commands Faster

    Stuck on a command? Don’t understand what a dimension constraint does? Instead of watching a 20-minute YouTube tutorial, ask Claude.

    Claude explains things in plain English. It gives examples. It adjusts its explanation if you ask it to simplify.

    It’s like having a patient teacher available every time you’re confused, making it easier to understand how to use Claude AI for CAD modeling.

    5. Reviewing and Suggesting Design Improvements

    You can describe your design to Claude and ask if there are any common problems or improvements. While Claude can’t see your actual CAD file, it can give general design guidance based on your description, enhancing your Claude AI mechanical design workflow.

    For example: “I’m designing a plastic enclosure that needs to snap together without screws. What design features should I include?”, Claude will give you a detailed, practical answer using principles from AI for CAD design.

    Step-by-Step Guide: Using Claude AI for Your CAD Drafting Workflow

    Here is a simple workflow you can start using today, even if you’re a complete beginner.

    1. Open Claude at claude.ai (free version available) in your browser alongside your CAD software.
    2. Describe your project clearly. Include dimensions, materials, and what the part needs to do, this is key to effective prompt engineering for designers.
    3. Ask for what you need, a script, a formula, documentation text, or design advice using natural language CAD commands.
    4. Review Claude’s output. Read it carefully and ask follow-up questions if anything is unclear.
    5. Paste or apply the output. Use scripts directly in AutoCAD, copy documentation into your drawing, or apply the design suggestion in your model.
    6. Iterate. Ask Claude to revise, expand, or simplify any output until it fits your needs exactly.

    That’s it. The whole process takes minutes, not hours, thanks to AI CAD software and automation.

    Step-by-step workflow using Claude AI alongside AutoCAD for mechanical CAD drafting

    Real-World Benefits of Using Claude AI for CAD Drafting

    Key Benefits at a Glance

    • Save 30–50% of time on repetitive documentation and scripting tasks using AutoCAD AI automation 2026
    • Reduce errors by checking your design logic with AI before finalizing
    • Learn CAD concepts faster through conversational explanations
    • Generate professional-quality technical text in seconds
    • Work through design challenges even when no colleague is available
    • Speed up onboarding for junior drafters and new team members
    • Improve drawing quality with AI-assisted technical drawing best practices

    These aren’t just theoretical benefits. Engineers are already using AI CAD tools for engineers to do more work in less time.

    Who Should Use Claude AI for CAD Drafting?

    Claude AI is useful across a wide range of users. Here’s a quick breakdown:

    User TypeHow Claude Helps
    Beginners / StudentsGet explanations, learn commands, understand design concepts without overwhelming documentation
    Freelance DraftersSpeed up documentation, script generation using AI for CAD design
    Mechanical EngineersAutomate calculations documentation and improve AI engineering design
    Architecture DraftersGenerate room schedules, material notes using AI-assisted technical drawing
    Non-Engineers / ManagersUnderstand drawings using natural language CAD commands
    Claude AI for mechanical CAD drafting before and after workflow comparison 2026

    Common Mistakes to Avoid When Using Claude for CAD

    Like any tool, Claude works best when you use it correctly. Here are the most common mistakes, and how to avoid them.

    Mistake #1: Vague Prompts
    BAD: “Draw a part for me.”
    GOOD: Use best AI prompts for AutoCAD drafting with clear details.

    Mistake #2: Trusting Output Without Review

    Always validate results, even when using advanced AI CAD software.

    Mistake #3: Trying to Replace CAD Completely

    Claude supports your workflow, it doesn’t replace AI CAD tools for engineers.
    Mistake #4: Not Iterating

    The real power comes from refining prompts, a core part of prompt engineering for designers.

    Pro Tips: Getting the Most Out of Claude AI for CAD Work

    Expert Insights

    • Use the “role” technique: Start your prompt with “You are an experienced mechanical engineer…”
    • Be specific with units
    • Ask Claude to explain its output
    • Save your best AI prompts for AutoCAD drafting
    • Combine Claude with CAD plugins for better results
    • Use Claude for reports and communication
    • Improve your Claude AI mechanical design workflow over time

    Conclusion:

    CAD drafting doesn’t have to be a slow, frustrating process.

    With Claude AI for CAD drafting, you have a powerful assistant that can help you write scripts, generate documentation, learn commands, and solve design problems, all through a simple conversation.

    Whether you’re a beginner or an experienced engineer, adopting AI for CAD design and AI engineering design tools will transform how you work.

    The best part? You can start for free, right now, at claude.ai.

    Want to go deeper?Read our complete Pillar Guide: Prompt Engineering in Mechanical Engineering, the ultimate resource for using AI in every part of your engineering workflow.

    Frequently Asked Questions (FAQ)

    Q1. Can Claude AI actually help with CAD drafting if I’m not an engineer?

    Yes, tools like AI CAD tools for engineers are beginner-friendly and designed for accessibility.

    Q2. Does Claude AI work directly inside AutoCAD or SolidWorks?

    Not directly, but it enhances workflows involving AI CAD software.

    Q3. Is Claude AI free to use for CAD drafting?

    Yes, and it’s one of the easiest ways to explore how to use Claude AI for CAD modeling.

    Q4. What is the difference between Claude AI and ChatGPT for CAD work?

    Both support AI engineering design, but differ in approach and strengths.

    Q5. Can Claude AI write AutoLISP scripts for AutoCAD?

    Yes, especially when using best AI prompts for AutoCAD drafting.

    Q6. Is it safe to use AI-generated CAD scripts in professional projects?

    Yes, but always validate outputs when working with AI CAD tools for engineers.

    Q7. What is prompt engineering and why does it matter for CAD drafting?

    It’s the process of writing better inputs to get better outputs, essential in prompt engineering for designers and modern AI for CAD design workflows.

  • Prompt Engineering in Mechanical Engineering: The Complete 2026 Guide

    Prompt Engineering in Mechanical Engineering: The Complete 2026 Guide

    Let me be honest with you. I’ve spent years watching engineers, smart, experienced people, spend 60% of their time on work that shouldn’t take that long. Redrawing the same shaft geometry with slightly different dimensions. Writing the same fatigue analysis report with different numbers plugged in. Setting up simulation boundary conditions that any trained model could handle in seconds.

    That’s not engineering. That’s data entry with better tools.

    In 2026, something shifted. AI in mechanical engineering stopped being a novelty that could write you a poem and started becoming genuinely useful in technical workflows. The engineers who understood this early aren’t working faster they’re working on harder problems, because the repetitive layer is handled.

    The key skill that separates engineers who use AI effectively from those who don’t? Prompt engineering in mechanical engineering. Knowing how to write instructions that get you useful, technically accurate output, not vague summaries you’d never use on the shop floor.

    This guide covers CAD, simulation, documentation, and full AI pipelines, with real prompt examples you can actually use.

    What Is Prompt Engineering? (For Engineers)

    A prompt is an instruction to an AI model. That’s it. If you’ve ever written a CAD macro, defined a simulation load case, or written a test procedure, you already understand the concept: you’re giving a system a precise set of conditions and expecting a specific output. The difference is that AI works in natural language, but ‘natural’ doesn’t mean imprecise. The best prompts read more like engineering specifications than casual conversation.

    Think of it this way:

    • CAD command: EXTRUDE distance=50mm direction=Z material=SS316
    • Engineering prompt: “Create a cylindrical shaft, diameter 50mm, length 200mm, stainless steel 316. Add 2mm chamfers on both ends. Output dimensions in SI units.”

    Same precision. Different interface.

    Why Engineers Need Structured Prompts

    Here’s where most people go wrong. They treat AI like a search engine — throw in a vague query and hope for a useful answer.

    • Vague prompt: “Design a bracket.” → Generic, unusable output. No material. No load case. No mounting pattern.
    • Structured prompt: “Design a steel mounting bracket for a 5kg motor. Mounting surface: 120mm × 80mm. Bolt pattern: M8 bolts, 4-hole, 60mm × 40mm PCD. Expected load: 50N lateral, 20N vertical. Provide thickness recommendation with basic stress justification.” → Something you can take into a design review.

    The pattern: be specific, define constraints, use engineering language.

    Role of AI in Mechanical Engineering: The 2026 Shift

    Where AI Is Actually Being Used

    Stop reading about what AI might do someday. Here’s where AI in mechanical engineering is being used right now in real engineering teams:

    • CAD and product design: generating initial geometry, automating parametric variations, suggesting topology optimizations.
    • Simulation pre-processing: writing boundary condition setups, mesh strategy recommendations, interpreting FEA and CFD results in plain language.
    • Documentation: probably the biggest win. BOMs, inspection reports, SOPs, technical data sheets. Hours of writing, cut to minutes.
    • Manufacturing planning: DFM checks, tolerance stackup analysis, process selection recommendations.

    From Prompting to AI Workflows

    Single prompts are useful. But the real leverage comes from chained AI workflow engineering, where the output of one AI step becomes the input for the next. A design prompt generates a geometry description → that feeds a simulation setup prompt → simulation results feed a report generation prompt → report gets reviewed by the engineer. Each step is still engineer-directed. The AI doesn’t make the call — you do. But you’re making calls, not copying numbers into a template.

    Prompt Engineering for CAD & Product Design

    How AI Helps in the CAD Design Process

    Prompt Engineering for CAD & Product Design

    AI can’t open SolidWorks and move your mouse. Let’s be clear about that. What prompt engineering for CAD actually enables:

    • Generate parametric model descriptions that you or a CAD tool can execute
    • Suggest geometry based on functional requirements
    • Review your design intent and flag potential issues before you model anything
    • Automate repetitive variants, same component, twenty different sizes

    Real Prompt Example: CAD Design

    Create a 3D model specification for a cylindrical shaft with the following:

    - Outer diameter: 50mm

    - Length: 200mm

    - Chamfer both ends: 2mm x 45 degrees

    - Central keyway: 12mm wide, 5mm deep, 150mm long

    - Material: 316 stainless steel

    - Surface finish: Ra 0.8um on bearing seats

    - Tolerance: h6 on journal diameters

    Output: dimension table + GD&T callouts suitable for a manufacturing drawing

    Compare that to “design a shaft.” The structured version gives you something you can take into a design review.

    The Text-to-CAD Concept

    Text-to-CAD is still maturing, but the trajectory is clear. Tools are moving toward accepting engineering specifications in natural language and generating parametric geometry directly. The underlying skill, writing specifications that are complete and unambiguous, is the same skill that makes you a good engineer. Prompt engineering for CAD just gives it a new application.

    You may like: Claude AI for CAD Drafting: The Smarter Way to Design Faster in 2026

    Prompt Engineering for Simulation & Analysis

    Use Cases That Are Actually Ready

    Not everything in simulation is AI-ready. But these areas are solid for AI for simulation and documentation:

    • Structural analysis setup: defining loads, constraints, mesh strategy recommendations
    • Thermal analysis: boundary conditions, material properties, solver settings guidance
    • Results interpretation: explaining von Mises stress plots, identifying failure modes in plain language
    • Load combination generation: creating the matrix of cases for fatigue or safety factor checks

    Real Prompt Example: FEA Setup

    Set up a structural analysis for the following scenario:

    Component: steel I-beam (S275 grade)

    Geometry: 2000mm length, 200mm x 100mm x 8mm web, 10mm flanges

    Loading: 500N point load at midspan, applied vertically downward

    Boundary conditions: simply supported — pinned at both ends

    Required outputs:

      - Maximum bending stress

      - Mid-span deflection

      - Safety factor vs yield (target SF >= 2.5)

    Provide: hand calculation verification + recommended mesh density for FEA

    Prompt Engineering for Simulation & Analysis

    This is the kind of prompt that gets you something reviewable. Sanity check the hand calc, run the FEA, compare, and if they diverge, you know to look deeper.

    Benefits in Practice

    The time savings in simulation aren’t in the solver, it’s in the setup and interpretation. A junior engineer might spend half a day getting boundary conditions right and another half-day writing up what the results mean. A well-structured AI for simulation and documentation workflow cuts both significantly, freeing that engineer to spend time on decisions that require actual judgment.

    AI for Engineering Documentation: The Hidden Gold

    Nobody talks about this enough. Documentation is where AI pays for itself fastest.

    What Can Be Automated

    • Technical reports: test reports, design review summaries, failure analysis write-ups
    • Bills of Materials: formatted, cross-referenced, with material callouts
    • Standard Operating Procedures: step-by-step process docs from a rough description
    • Inspection plans: characteristic-by-characteristic inspection criteria from a drawing
    • Engineering Change Notices: structured change documentation with revision history

    Real Prompt Example: Technical Report

    Generate a technical report for the following mechanical assembly:

    Assembly: Pump impeller, centrifugal, single-stage

    Material: CA6NM stainless steel casting

    Manufacturing process: Investment casting + CNC machining of wearing surfaces

    Key dimensions: 320mm OD, 8 vanes, 45 degree vane angle

    Report must include:

    1. Material specification with relevant ASTM standard

    2. Manufacturing process description and key tolerances

    3. Surface finish requirements by zone

    4. Pressure test requirements (hydrostatic at 1.5x working pressure)

    5. Safety considerations for handling and installation

    6. Quality acceptance criteria

    Format: Section headings, metric units, formal engineering tone

    Draft in 30 seconds. Review and revise in 10 minutes. Compare that to writing from scratch.

    AI Workflows in Mechanical Engineering: The Real Game Changer

    Traditional Workflow vs AI Workflow

    traditional workflow vs AI assistance workflow

    Building a Real AI Workflow: Complete Example

    Here’s a complete AI workflow engineering example: a bracket design through to documentation:

    Step 1 Design Prompt:

    Specify geometry for a cantilever bracket:

    – Wall-mounted, single bolt row, M10 x 4 bolts

    – 200mm projection

    – Supports 80kg static load (785N) at tip

    – Material: mild steel, S235

    Output: recommended plate thickness, weld size at wall

    Step 2 Simulation Prompt (using output from Step 1):

    Verify the following bracket by hand calculation:

    – 10mm plate, 200mm cantilever, 785N tip load

    – Fixed at wall (full restraint)

    Calculate: maximum bending stress, tip deflection

    Compare against S235 yield (235MPa), target SF = 2.0

    Step 3 Documentation Prompt:

    Write a one-page design verification note for the bracket described above.

    Include: design intent, load assumptions, stress calculations (insert values),

    safety factor achieved, material spec, weld inspection requirement.

    Format: engineering memo, signed/dated fields at footer.

    Three prompts. One coherent output. The engineer reviews each step, catches errors, and makes judgment calls, not the arithmetic.

    Claude AI vs Other AI Tools for Engineers

    Where Claude AI Engineering Workflows Excel

    Claude AI engineering workflows handle long, complex technical context better than most general-purpose models. If you’re writing a prompt that includes a full component specification, multiple load cases, material properties, and output formatting requirements, Claude maintains that context reliably through the response. It’s also strong on structured outputs, tables, numbered procedures, formatted reports, and it reasons through engineering problems step by step rather than jumping to answers, which matters when you need to audit the logic.

    When to Use Other Tools

    • CAD-specific AI tools (SolidWorks, Fusion), better for direct geometry manipulation. They have direct API access to the CAD kernel.
    • Simulation software AI (ANSYS, Simcenter), better for direct solver interaction.

    The pattern: use domain-specific tools for execution, use Claude AI engineering for reasoning, structuring, and documentation.

    Best Practices for Prompt Engineering: What Actually Works

    Five Rules That Matter

    1. Be specific about units, standards, and formats. “Metric units, SI, ASTM standards, decimal notation” should be in every engineering prompt.
    2. Define constraints before asking for output. Put loads, materials, geometry, and standards compliance before your question.
    3. Ask for justification, not just answers. Add “show the calculation” or “explain the reasoning” to any prompt where you need to audit the output.
    4. Use engineering vocabulary. “Von Mises stress,” “fixed-fixed boundary condition,” “h6 tolerance” use correct terms. Vague language produces vague responses.
    5. Iterate deliberately. First output is rarely final. Treat it like a first draft from a junior engineer review, identify gaps, write a refined prompt.

    Common Mistakes Engineers Make

    • Writing vague prompts and blaming AI. If your prompt doesn’t have enough constraints, the output can’t be better than random.
    • Ignoring units and standards. Imperial vs metric. ASTM vs BS vs DIN. This kills usability fast.
    • Expecting perfect output on the first try. AI is a first-pass tool, not a stamp-and-approve tool. Build review into your workflow.
    • Not verifying against hand calculations. Any structural or thermal result from AI should be sanity-checked analytically. You’re the engineer of record.
    • Using it in isolation. The power is in chained workflows. A full design-simulate-document pipeline saves hours.

    Future of Prompt Engineering in Mechanical Engineering

    What’s Coming That’s Actually Credible

    • AI agents for engineering tasks: systems that take a high-level objective and autonomously run geometry check, stress calc, documentation, flagging anything that needs engineer review.
    • Multimodal design: AI that reads your 2D drawings or 3D screenshots and responds to them. Some tools already do this; quality will improve significantly.
    • Context engineering: moving beyond single prompts to persistent engineering contexts. AI that knows your company’s standard materials, preferred suppliers, design standards, and past designs.
    • Autonomous simulation pre-processing: prompt-driven mesh generation, load case setup, and solver configuration that outputs directly to your FEA/CFD tool. The gap between “describing” and “running” a simulation is closing.

    Conclusion

    Prompt engineering in mechanical engineering isn’t magic, and it doesn’t replace engineering judgment. What it does is eliminate the overhead, the time spent on setup, documentation, and repetitive analysis that adds no intellectual value to your work.

    The engineers who master AI workflow engineering in the next two years will have a significant competitive advantage. Not because they’re using AI, but because they’ll spend more time on the problems that actually require an engineer, the judgment calls, the creative design work, the decisions that carry consequences.

    Start with one workflow. Pick prompt engineering for CAD, simulation, or documentation, whichever eats the most of your time right now. Build a handful of well-structured prompts. Iterate them. Build a library. Then expand.

    The shift from manual to AI-assisted engineering doesn’t happen all at once. It happens one well-written prompt at a time.

    Frequently Asked Questions (FAQs)

    Q1: Can AI actually generate usable CAD models from text prompts?

    Text-to-CAD is improving rapidly. In 2026, tools like Autodesk’s AI integration and standalone text-to-3D platforms can generate geometry from structured prompts. Output quality scales directly with prompt precision. Complex assemblies still require significant engineer review and refinement, but the starting point is dramatically faster.

    Q2: Is prompt engineering a real skill worth learning for engineers?

    Yes, it’s becoming as foundational as knowing how to write a good test spec or engineering memo. Vague prompts return vague results. Engineers who invest in structured prompt techniques consistently get higher-quality, usable AI output compared to those who treat it like a search engine.

    Q3: Will AI replace mechanical engineers?

    No, and the reason is practical, not philosophical. Engineering involves accountability, judgment under uncertainty, and design decisions with safety consequences. AI accelerates the repetitive analytical layer. It doesn’t replace the engineer who signs off on the design. The risk: engineers who don’t learn AI tools may lose ground to those who do.

    Q4: Which AI is best for engineering documentation and simulation?

    For documentation, report writing, and analytical reasoning Claude AI engineering workflows perform well due to strong context handling and structured output quality. For direct CAD manipulation and simulation execution, domain-specific tools embedded in ANSYS, SolidWorks, or Fusion 360 are better. Use them in combination, not competition.

    Q5: How do I start using prompt engineering in my current engineering role today?

    Start with documentation, it has the lowest risk and highest immediate payoff. Take your next inspection report, technical memo, or SOP and draft a structured prompt including the component description, key specifications, required sections, and output format. Review critically, iterate, and refine. Once you have two or three reliable prompt templates, move to simulation or design specification work.

  • GD&T Explained: How Geometric Dimensioning and Tolerancing Works in CAD

    GD&T Explained: How Geometric Dimensioning and Tolerancing Works in CAD

    Two machined parts are designed to fit together. The drawing shows a diameter of 25.00 mm with a plus/minus tolerance of 0.10 mm, but it says nothing about whether that bore is allowed to be oval, tapered, or tilted relative to the mating face. The parts are made to the numbers on the drawing. They still do not fit.

    This is the problem that Geometric Dimensioning and Tolerancing (GD&T) was developed to solve. Traditional plus/minus tolerancing defines size. GD&T defines shape, orientation, location, and form. It is the difference between telling a machinist how big to make a feature and telling them exactly how precise its geometry needs to be, in every dimension that matters functionally.

    This guide covers what GD&T is, how it works, the 14 core symbols, how to read a feature control frame, and the most common mistakes that drive up manufacturing cost unnecessarily.

    What Is GD&T and Why Does It Exist?

    GD&T stands for Geometric Dimensioning and Tolerancing. It is a standardised symbolic language applied to engineering drawings to define the allowable variation in the shape, size, orientation, and location of part features. In the United States, it is governed by ASME Y14.5-2018 (the most recent revision of the standard). Internationally, the equivalent is ISO 1101.

    The system exists because coordinate tolerancing, the older method of simply assigning plus/minus values to X, Y, and Z dimensions, is inherently limited. Consider a bolt hole pattern on a flange. A coordinate tolerance defines a square tolerance zone around each hole’s nominal position. GD&T’s True Position control defines a cylindrical tolerance zone centred on the exact theoretically perfect location. The cylindrical zone is 57% larger in area than the equivalent square zone for the same stated tolerance value, meaning more parts pass inspection without any compromise to the functional requirement. That directly reduces scrap and rework cost.

    GD&T does not make tolerances tighter. Used correctly, it makes tolerances more precisely matched to functional requirements, which often means they can be looser in areas that do not affect fit or function.

    Beyond the efficiency argument, GD&T eliminates ambiguity. A drawing annotated with GD&T controls is interpreted the same way by any engineer, machinist, or quality inspector who knows the standard, whether they are in your facility or a supplier facility on the other side of the world. That universality is essential when manufacturing is distributed across multiple suppliers or geographies.

    The 5 Categories of GD&T Controls

    5 Categories of GD&T Controls | ASME Y14.5 | ISO 1101 | MMC

    GD&T controls are grouped into five categories, each addressing a different aspect of geometric variation. Understanding these categories is the foundation for knowing which symbol to apply and when.

    CategoryControlsSymbols IncludedTypical Use Case
    FormShape of a surface or feature in isolation, no datum neededFlatness, Straightness, Circularity, CylindricitySealing faces, bearing bores, precision guide rails
    OrientationAngle of a feature relative to a datumParallelism, Perpendicularity, AngularityMating flanges, gearbox housings, mounting faces
    LocationPosition of a feature relative to a datum reference frameTrue Position, Concentricity, SymmetryBolt hole patterns, shaft centrelines, symmetric slots
    RunoutVariation of a surface as a part rotates about a datum axisCircular Runout, Total RunoutRotating shafts, pulleys, brake rotors
    ProfileShape and location of any surface or lineProfile of a Line, Profile of a SurfaceAerofoil sections, complex curves, cast/moulded surfaces

    The critical distinction between Form controls and all other categories is that Form controls, flatness, straightness, circularity, and cylindricity, do not reference a datum. They describe the shape of a feature in isolation. Every other control references at least one datum because it describes the relationship of a feature to something else.

    The 14 GD&T Symbols: A Complete Reference

    ASME Y14.5 defines 14 geometric characteristic symbols, one for each type of control. The table below provides the name, category, and a plain-English description of what each symbol controls. Keep this as a reference when annotating drawings or reviewing a drawing package from a supplier or design partner.

    14 GD&T Symbols | ASME Y14.5 | Simutecra
    Symbol NameCategorySymbol / Abbr.What It Controls
    FlatnessFormFlat symbolHow flat a surface is, all points must lie within two parallel planes
    StraightnessFormStraight symbolHow straight a line or axis is, applies to surface lines or feature axes
    CircularityFormCircle symbolHow round a circular cross-section is at any given point along its length
    CylindricityFormCylinder symbolCombines roundness and straightness, controls the full cylinder surface
    ParallelismOrientation// symbolControls a surface or axis to be parallel within a tolerance to a datum
    PerpendicularityOrientation90 deg symbolControls a surface or axis to be perpendicular within a tolerance to a datum
    AngularityOrientationAngle symbolControls a surface or axis to be at a specified angle to a datum
    True PositionLocationTarget symbolDefines the exact (theoretically perfect) location of a feature from datums
    ConcentricityLocationCircle-dotControls the axis of a feature to coincide with a datum axis (rarely used now)
    SymmetryLocation= symbolControls the median points of a feature to lie in a datum plane (rarely used)
    Circular RunoutRunoutSingle arrowControls surface variation at any single cross-section when part rotates
    Total RunoutRunoutDouble arrowControls cumulative variation across the entire surface as the part rotates
    Profile of a LineProfileArc open symbolControls the shape of a cross-sectional curve relative to a true profile
    Profile of a SurfaceProfileArc filled sym.Controls the shape of an entire surface relative to its true theoretic form

    Note on Concentricity and Symmetry: Both symbols are retained in ASME Y14.5-2018 but their use is now actively discouraged for most applications. They require median-point measurement, which is expensive and difficult to inspect reliably. In most cases, True Position with an appropriate material condition modifier achieves the same functional result and is far easier to measure. When you see these symbols on a drawing, it is worth questioning whether they are the right choice.

    How to Read a Feature Control Frame

    The feature control frame is the rectangular annotation box on a drawing that specifies a GD&T requirement. Every GD&T callout uses one. Reading it correctly is a fundamental skill for anyone working with engineering drawings.

    A feature control frame is divided into compartments read from left to right:

    Box 1Box 2Box 3Box 4 (optional)
    True Position symbolDiameter symbol + 0.5A  (primary datum)B  (secondary datum)
    Which geometric characteristic is being controlledThe tolerance value (and shape of the tolerance zone, diameter symbol = cylindrical zone)The primary datum this control referencesAdditional datums if needed (up to three)

    Worked example: A True Position callout reads as follows, the leftmost compartment shows the True Position symbol (a circle with crosshairs). The second compartment shows the diameter symbol followed by 0.5. The third compartment shows ‘A’. This means: the axis of this feature must fall within a cylindrical tolerance zone of diameter 0.5 mm, centred on the theoretically exact position defined relative to datum A. If a second datum ‘B’ appears in a fourth compartment, the position is also constrained relative to that secondary reference.

    Geometric Dimensioning and Tolerancing (GD&T) is governed by internationally recognized standards such as the ASME Y14.5 standard, which provides rules, symbols, and guidelines for interpreting engineering drawings accurately.

    Geometric Dimensioning and Tolerancing (GD&T)

    Understanding Datums

    A datum is a theoretically exact point, axis, or plane from which measurements on a drawing are taken. In practice, datums are established by physical contact with datum features, the real surfaces, bores, or faces on the actual part that approximate the theoretical datum.

    Datums are hierarchical. The primary datum (A) constrains the most degrees of freedom, typically established by the largest flat surface, which removes three degrees of freedom in a Cartesian system. The secondary datum (B) constrains two more. The tertiary datum (C) constrains the final degree of freedom. Together, the three-datum reference frame fully defines where the part sits in space, making every measurement repeatable and unambiguous.

    The selection of datums is one of the most important decisions in applying GD&T. Datums should reflect the functional interface of the part, how it is located, constrained, and mated when it is in service. A datum chosen for manufacturing convenience rather than functional interface will produce parts that are easy to make but difficult to assemble correctly.

    Real-World Example: A Precision Pump Housing

    A pump housing has a central bore that must align accurately with the motor shaft axis. The mating face (the flat surface that bolts to the motor) is established as Datum A. The central bore of the housing is Datum B. The bolt hole pattern is controlled with True Position relative to Datums A and B.

    Without GD&T: the bolt holes are dimensioned from an edge with plus/minus tolerances. The machinist makes the holes to the numbers. But if the mating face is not perfectly square to the bore, the holes end up in the right coordinate positions but the housing does not align when assembled. The parts are technically within tolerance and still fail functionally.

    With GD&T: the perpendicularity of the bore axis to the mating face is controlled explicitly. The bolt hole positions are defined relative to the bore centreline. The machinist and the inspector both have unambiguous requirements. Parts made to the drawing will assemble correctly, not because they happened to be made well, but because the drawing required it.

    Common GD&T Mistakes That Drive Up Manufacturing Cost

    GD&T applied well reduces manufacturing cost by ensuring tolerances match functional requirements, no tighter, no looser. Applied poorly, it can make drawings unnecessarily expensive to manufacture and inspect. These are the most frequent errors seen in GD&T annotations:

    MistakeWhat Goes WrongHow to Avoid It
    Over-tolerancingEvery feature is given a very tight tolerance ‘just to be safe’. Machining costs skyrocket because tight tolerances require slower speeds, more passes, and inspection at every stage.Apply tight tolerances only where fit or function genuinely requires them. Most features can tolerate far more variation than designers assume.
    Missing datum referencesA positional or orientation tolerance is called out with no datum specified. The machinist has no reference frame, the control is unenforceable.Every location and orientation control requires at least one datum. Form controls (flatness, circularity) are the exception, they do not need datums.
    Redundant dimensionsDimensions are duplicated across views, creating a closed loop. When tolerances stack up, it becomes mathematically impossible to satisfy all of them simultaneously.Use reference dimensions (marked REF) for informational dimensions that already appear elsewhere. Never create a fully closed dimension chain.
    Ignoring material condition modifiersMMC (Maximum Material Condition) and LMC (Least Material Condition) modifiers allow tolerances to vary with feature size. Ignoring them means leaving allowable tolerance on the table, which raises manufacturing cost unnecessarily.Understand MMC and LMC for hole-shaft fits and bolt patterns. Apply the appropriate modifier when the function of the part allows it.
    Applying GD&T to the wrong featuresA surface finish control is applied to a non-functional surface that has no mating or sealing requirement. This adds inspection cost for no functional benefit.Apply controls only where they serve a functional purpose. Ask: ‘What breaks if this is out of specification?’ If nothing breaks, the control is unnecessary.

    GD&T in CAD Software

    Most professional 3D CAD platforms include GD&T annotation tools that apply feature control frames, datum labels, and tolerances directly to the model or to drawings generated from it. In SolidWorks, GD&T is added through the Annotations toolbar using the Geometric Tolerance dialog. CATIA uses its FT&A (Functional Tolerancing and Annotation) workbench. AutoCAD Mechanical includes a dedicated GD&T toolbar.

    Increasingly, manufacturers and OEMs are moving towards Model-Based Definition (MBD), embedding all GD&T and drawing information directly in the 3D model rather than generating 2D drawings. Under MBD, the 3D model itself is the authoritative manufacturing document. While MBD is not yet universal, its adoption is accelerating in aerospace, automotive, and precision manufacturing sectors.

    Regardless of whether GD&T is applied to 2D drawings or 3D models, the underlying standard, and the functional thinking behind it, remains the same.

    Frequently Asked Questions

    1. Is GD&T required on all engineering drawings?

    No, Geometric Dimensioning and Tolerancing (GD&T) is not required on all drawings. It is only used when form, orientation, or location of a feature is functionally critical.
    For simple parts, coordinate tolerancing is usually sufficient. The key is to apply GD&T based on functional requirements, not habit.

    2. What is the difference between ASME Y14.5 vs ISO 1101?

    ASME Y14.5 and ISO 1101 are both GD&T standards, but they differ in rules and usage:

    • ASME Y14.5 → Common in the U.S., uses third-angle projection and specific rules for MMC, RFS
    • ISO 1101 → Used in Europe & Asia, has different symbols and interpretations

    Always confirm the standard used in drawings to avoid misinterpretation.

    3. How does GD&T affect machining cost?

    GD&T directly impacts manufacturing cost:

    • Tighter tolerances = more machining time, tooling, and inspection
    • Proper GD&T reduces scrap, rework, and errors

    A well-defined GD&T drawing ensures precision only where needed, optimizing both cost and performance

    4. Can GD&T be applied in 3D CAD models?

    Yes. This is called Model-Based Definition (MBD).
    GD&T is embedded directly into 3D CAD models using tools like:

    • SolidWorks MBD
    • CATIA FT&A
    • NX PMI

    Benefits include a single source of truth, reduced errors, and improved engineering communication.

    5. What does MMC (Maximum Material Condition) mean?

    MMC (Maximum Material Condition) refers to the state where a feature contains the maximum amount of material:

    • Shaft → Largest diameter
    • Hole → Smallest diameter

    Using the MMC modifier allows bonus tolerance, increasing flexibility and reducing manufacturing rejection rates without affecting function.

    The Bottom Line

    GD&T is not an optional extra for complex parts, it is a precision tool for communicating exactly what a part needs to do geometrically, and exactly how much variation is acceptable before it stops doing it. Used correctly, it reduces manufacturing cost, eliminates inspection ambiguity, and prevents the most common class of fit-and-function failures: parts made to the right dimensions that still do not work when assembled.

    The investment in understanding GD&T, whether you are an engineer annotating drawings, a buyer reviewing a supplier’s documentation, or a quality manager setting up inspection criteria, pays back directly in fewer scrapped parts, fewer assembly problems, and fewer drawing revisions after the fact.

    If you are reviewing an existing drawing set and want a second opinion on whether the tolerances are appropriate, or if you need GD&T applied correctly to a new design, that is exactly the kind of review SimuTecra’s drafting team provides.

    Getting GD&T Right the First Time Saves Significant Cost

    SimuTecra’s drafters apply GD&T to ASME Y14.5-2018 and ISO 1101 standards. We review every tolerance callout against the functional requirements of your part, not just the geometry. That means your drawings are manufacturable, inspectable, and cost-appropriate.

    Share your part requirements and we will review your current drawing or produce a new one, correctly toleranced from the start.

  • How to Use Claude to Understand Engineering Drawings (A Guide for Non-Engineers)

    How to Use Claude to Understand Engineering Drawings (A Guide for Non-Engineers)

    You are in a project meeting. The engineer slides a drawing across the table, or emails you a PDF and asks if you are happy with it. It is full of lines, numbers, symbols, and notations that mean nothing to you. You nod along, take a copy, and plan to figure it out later. This happens constantly in product development, procurement, and construction management, and it creates real risk: decisions made without understanding what is actually being decided.

    Claude AI gives non-engineers a practical way out of this situation. You do not need to learn to read engineering drawings from scratch. You need to be able to ask the right questions about a specific drawing in front of you, and get answers in plain language that let you make informed decisions. This guide shows you exactly how to do that.

    Why Engineering Drawings Are Hard to Read Without Training

    Engineering drawings use a standardised visual language developed over more than a century. Views that show the same object from multiple angles simultaneously. Dimension lines with tolerances expressed in notation most people never encounter outside an engineering context. Symbols for surface finish, geometric tolerancing, and material treatment that have precise technical meanings invisible to the untrained eye.

    Engineering drawings are the standardized,2D technical representations of 3D objects, essential for manufacturing and engineering communication. They are governed by international standards (ISO, ASME) and are critical, with roughly 70% of modern industrial product quality problems originating from drawing errors. 

    Source: Wikipedia Engineering Drawing

    This language exists for good reason. It communicates information precisely and unambiguously between trained engineers and machinists around the world, without that precision, manufactured parts would not fit together reliably. But that same precision makes drawings opaque to anyone who did not spend years learning the notation.

    The gap this creates is significant. Project managers approve designs they cannot fully evaluate. Procurement teams sign off on drawing packages without knowing whether a tolerance is achievable or a specification is realistic. Founders receive deliverables from CAD partners without being able to verify they got what they paid for. Claude does not replace engineering knowledge, but it closes this gap meaningfully for the people who need it most.

    You do not need to become an engineer to have a useful conversation about an engineering drawing. You need to know what to ask and how to ask it. Claude handles the translation.
    engineering drawing explained for beginners | how to read technical drawing | engineering blueprint parts labelled

    What Claude Can Actually Help You Decode

    Before walking through the prompts, it helps to know what kinds of information are on a typical engineering drawing, and which of those Claude can explain in plain language when you describe or paste them in.

    The Title Block

    Every engineering drawing has a title block, usually in the bottom-right corner, that contains the part name, drawing number, revision level, material specification, scale, drawing standard (ASME or ISO), and the name of the engineer who created and approved it. This block tells you what you are looking at and whether the drawing is current. Claude can explain any field in the title block if you describe what you see.

    Views and Projections

    Engineering drawings typically show the same object from multiple angles, front, top, and side views, arranged in a standard layout. There may also be section views (which cut through the part to show internal features) and detail views (which zoom in on complex areas). Claude can explain why each view exists and what it is showing you.

    Dimensions and Tolerances

    Numbers on a drawing tell the manufacturer how big each feature is. The tolerance, shown as a plus/minus value or as a range, tells them how much variation is acceptable. When you see a dimension like ‘25.0 ±0.1’, Claude can explain what that means in practice: how precise the machinist needs to be, and what happens functionally if that tolerance is not met.

    GD&T Symbols

    Geometric Dimensioning and Tolerancing symbols are the most opaque part of a drawing for non-engineers. Small boxes containing geometric symbols and numbers define requirements for flatness, perpendicularity, position, and other geometric properties of features. Claude can translate these into plain language and explain why each control matters.

    Notes and Specifications

    Most drawings include a general notes section that specifies things like surface finish requirements, heat treatment, cleaning specifications, and drawing standards that apply across the whole part. Claude can explain any note you copy and paste in.

    The Prompts to Use, and When to Use Them

    These prompts are designed for the specific situations a non-engineer typically faces when dealing with engineering drawings. Use them directly in Claude, describe what you are seeing, paste text from the drawing where possible, and ask follow-up questions until you have clarity.

    When You Need to Understand the Drawing Overall

    PROMPT 1: General Understanding
    I have received an engineering drawing and I am not an engineer. I will describe what I can see on it. Please explain each element in plain language, what it means, why it is there, and what a manufacturer needs to do with it.[Describe the drawing: how many views there are, what the part appears to be, what numbers and symbols you can see, what the title block says, any notes sections, anything else that stands out]

    This is your starting point when you are looking at an unfamiliar drawing for the first time. Claude will give you a structured explanation of what each part of the drawing communicates. Take notes on the things you want to follow up on.

    When You Need to Verify a Specific Dimension or Tolerance

    PROMPT 2: Tolerance Check
    On this engineering drawing, there is a dimension that reads [describe the dimension exactly, e.g. ‘18.5 +0.0/-0.2 mm on a shaft diameter’]. Can you explain:1. What this means in plain language2. How precise the machinist needs to be3. Whether this is a tight tolerance or a loose one for this type of feature4. What would happen functionally if this tolerance was not met

    Use this when a specific dimension is being discussed in a meeting or when you want to understand whether a quoted tolerance is reasonable for the application. Claude’s answer gives you informed questions to ask your engineering team rather than having to take their answer on faith.

    Read more on Prompt Engineering for CAD Drafting and Engineering Design

    When You See a GD&T Symbol You Do Not Recognise

    PROMPT 3: GD&T Symbol Explanation
    On this engineering drawing, there is a rectangular box with symbols in it. From left to right it shows: [describe what you see e.g. ‘a circle with a cross inside it, then the diameter symbol and 0.5, then the letter A’].Please explain:1. What type of geometric control this is2. What it is requiring the manufacturer to achieve3. Why this control might be on this particular feature4. What would go wrong if this requirement was ignored

    GD&T symbols are the most intimidating part of a drawing for non-engineers. This prompt turns any symbol combination into a plain-language explanation. You do not need to know what the symbol is called, just describe what you see.

    When You Are Reviewing a Drawing Before Approving It

    PROMPT 4: Pre-Approval Review
    I need to review and approve an engineering drawing before it goes to a manufacturer. I am not an engineer but I am responsible for sign-off.I will describe the drawing to you. Please help me:1. Identify the most important things to check before approving2. Flag any information that appears to be missing or incomplete3. Suggest questions I should ask the engineer before I sign off4. Highlight anything that seems unusual or worth querying[Describe the drawing in as much detail as you can]

    This prompt is for procurement leads, project managers, and technical directors who need to sign off on drawing packages without having the engineering background to evaluate them independently. Claude acts as a structured second pair of eyes, not verifying the engineering, but identifying gaps and generating informed questions.

    When You Want to Understand How the Part Is Made

    PROMPT 5: Manufacturing Context
    Based on this engineering drawing, I want to understand how this part would typically be manufactured. The drawing shows [describe: the part shape, material noted, any surface finish callouts, any notes about manufacturing process].Please explain:1. What manufacturing process would most likely be used to make this part2. Which features are the most difficult or expensive to machine3. Whether the tolerances specified look typical or unusually tight for this type of part4. What I should understand about the manufacturing process when reviewing the timeline and cost estimate

    This is particularly useful when you are evaluating a quote from a manufacturer. Understanding which features drive cost and lead time means you can have a much more productive conversation about schedule and price and spot if something in the quote does not add up.

    Claude AI explaining GD&T symbol | AI for engineering drawings | Claude technical drawing help

    What to Do With Claude’s Answers

    Claude gives you information and language. What you do with it determines the value. A few habits that make the most of Claude’s explanations in a real engineering context:

    • Write down the questions Claude’s answers generate. The goal is not to become an engineer overnight, it is to have better conversations with the engineers you work with. Use Claude to develop specific, informed questions and then take those questions to your engineering team or CAD partner.
    • Do not use Claude’s output as a substitute for engineering sign-off. Claude explains and interprets, it does not verify that a design is correct, that tolerances are achievable, or that a material is appropriate for the application. Those judgments require a qualified engineer.
    • Use the vocabulary Claude gives you. When Claude explains that the symbol on the drawing is a True Position control with a cylindrical tolerance zone referenced to Datum A, you now have the right terminology to ask your engineer a specific, targeted question. That changes the conversation.
    • Keep a running note of terms you have looked up. Engineering drawing vocabulary is consistent, once you have learned what a feature control frame is, that knowledge applies to every drawing you encounter. Build your own glossary as you go.

    Check our blog to get free 20 prompts every engineer should know

    The Limits of What Claude Can Do

    Claude works from descriptions. It cannot see images or PDFs directly, you need to describe what you are looking at in text. This means some nuance is inevitably lost: the exact geometry of a complex surface, the precise arrangement of views, the specific layout of a drawing that a trained engineer would read at a glance. For complex drawings, describing everything accurately enough to get a fully useful response takes effort.

    Claude also cannot tell you whether the engineering itself is correct. It can explain what a tolerance means but not whether that tolerance is achievable with the manufacturing process specified. It can explain what a material designation refers to but not whether that material is appropriate for the operating environment. It can tell you what questions to ask, not whether the answers are right.

    For high-stakes approvals, drawings that will go directly to manufacturing, structural components, pressure-containing parts, there is no substitute for a qualified engineering review. What Claude offers is the ability to participate meaningfully in that review process rather than being a passive spectator.

    Claude is the most useful engineering drawing tool you have access to if you are not an engineer. It is most valuable not as an answer machine, but as a question generator, giving you the language and confidence to have better conversations with the people who are.

    The Bottom Line

    Engineering drawings communicate with precision in a language most people never learn. That language barrier creates real risk in product development and procurement, decisions made by people who do not fully understand what they are deciding on. Claude does not eliminate that risk, but it reduces it meaningfully by giving non-engineers a way to engage with technical drawings in plain language.

    The five prompts in this guide cover the situations non-engineers encounter most often: understanding a drawing from scratch, checking a specific dimension, decoding a GD&T symbol, preparing for a sign-off review, and understanding the manufacturing implications of what is specified. Start there, follow up on anything that is not clear, and use what you learn to have better conversations with the engineers and CAD partners you work with.

  • Stop Wasting Claude AI: Prompt Guide for Engineers | Simutecra

    Stop Wasting Claude AI: Prompt Guide for Engineers | Simutecra

    Most people use Claude AI the same way they use a search engine, type a vague question, read the answer, move on. They get average results, conclude that AI is overrated, and miss the point entirely.

    Claude AI is not a search engine. It is a reasoning engine. And like any precision tool, the quality of output depends almost entirely on the quality of input. The engineers, drafters, and technical teams getting genuinely useful results from Claude AI for engineers are not smarter, they are writing better prompts.

    This is where prompt engineering Claude AI becomes critical.

    Specifically, they are writing Claude prompts for engineering that match how Claude processes information, which is fundamentally different from other tools. If you are learning how to use Claude AI effectively, understanding this difference is the starting point.

    This guide covers what makes Claude different, the techniques that unlock its real capability, and exactly how to apply prompt engineering Claude AI engineering design in real workflows.

    Claude AI chat interface by Anthropic showing a structured prompt input and response
    Claude AI by Anthropic is built differently from other AI models, and prompting it the same way you prompt ChatGPT leaves most of its capability unused.

    Why Claude Responds Differently, and Why It Matters for How You Prompt

    Understanding how Anthropic Claude works directly impacts how to write better prompts for Claude AI.

    Claude was built by Anthropic using Constitutional AI, a training approach that prioritises careful instruction-following, structured reasoning, and nuanced context understanding. The practical result: Claude treats your prompt like a contract. What you specify, it delivers. What you leave vague, it fills with reasonable assumptions, and those assumptions may not match what you actually need.

    That’s why structured prompts are essential.

    Two specific architectural features set Claude AI apart for technical and professional work:

    1. XML-native processing:

    Claude is designed to understand XML tags Claude structure natively.

    Using tags like:

    • <role>
    • <context>
    • <task>
    • <example>

    …helps create clear boundaries in your prompt. This is the foundation of any Claude AI XML tags tutorial and one of the biggest differences in Claude vs ChatGPT prompt engineering.

    This approach improves:

    • Accuracy
    • Consistency
    • Output formatting

    2. Massive context window:

    Claude models like Claude Sonnet and Claude Opus support extremely large context window sizes (up to ~200K tokens).

    This makes Claude ideal for:

    • Full engineering documents
    • Drawing notes
    • Large specifications

    This is where Claude AI for engineers clearly stands out in real workflows.

    Claude 4.x models also follow instructions more literally than previous versions. If you do not ask for something, you will not get it. This is a feature, not a bug, it means you get predictable, controllable outputs. But it requires you to be explicit. Vague prompts now produce vague results more reliably than ever.

    Anthropic publishes its own prompting best practices at docs.anthropic.com/en/docs/build-with-claude/prompt-engineering. It is worth reading directly, the official guidance is more useful than most third-party articles.

    The Claude-Specific Techniques That Actually Make a Difference

    These are not generic AI tips. These are techniques specific to how Claude processes prompts techniques that do not work as well, or work differently, with ChatGPT or Gemini.

    1. Use XML Tags to Structure Complex Prompts

    This is the single highest-impact change most engineers can make to their Claude prompts. When your prompt has multiple distinct components instructions, context, examples, variable inputs, wrap each in clearly labelled XML tags.

    <role>

    You are a structural engineer producing fabrication notes to AISC standards.

    </role>

    <context>

    The client is a steel fabricator in the US. They need material and weld notes

    for a 310UB46.2 floor beam, Grade 350 steel, connected via bolted end plates.

    </context>

    <task>

    Write 5 general notes for inclusion on the fabrication shop drawing.

    Cover: steel grade, weld standard, bolt specification, surface prep, inspection.

    </task>

    <format>

    Numbered list. Maximum 15 words per note. Plain language. No abbreviations.

    </format>

    Without XML tags, Claude treats the entire prompt as one undifferentiated block and has to guess how much weight to give each section. With tags, it processes each section independently role informs tone, context informs accuracy, task defines the output goal, format controls structure. The result is more focused, more consistent, and far less likely to blend irrelevant information into the output.

    Pro tip: Use consistent tag names across all your prompts and save them as reusable templates. Once Claude has learned your tag structure from context, outputs become even more predictable across sessions.

    Structured XML-tagged prompt example showing role, context, task, and format sections for Claude AI
    XML tagging is Claude’s native structuring language it creates clear semantic boundaries that produce dramatically more consistent outputs on complex, multi-part engineering tasks.

    2. Write Role Prompts with Specific Depth

    Role assignment works in all major AI models, but Claude responds to deeper specificity more reliably than most. The difference between ‘you are a structural engineer’ and ‘you are a structural engineer with 15 years of experience in industrial steel fabrication, familiar with AISC 360 and AWS D1.1, currently reviewing a drawing package before issue to a US fabricator’ is not cosmetic, it meaningfully shifts the accuracy and depth of the output.

    This improves accuracy in Claude prompts for engineering and ensures outputs match real-world standards.

    3. Activate Extended Thinking for Complex Problems

    Claude’s Extended Thinking mode allows the model to reason through a problem step by step before producing its final answer. For engineering tasks, load calculations, design decisions, drawing review, specification writing, this produces substantially better outputs than a single-pass response.

    To activate it in a prompt, you do not need special commands. Simply ask Claude to think through the problem before answering:

    Before writing the specification, work through the following:

    1. What are the key functional requirements for this part?

    2. Which tolerances are safety-critical vs non-critical?

    3. Which notes are mandatory vs informational?

    Then write the final specification based on your reasoning.

    This is particularly powerful for drawing reviews, where asking Claude to ‘check for completeness before summarising findings’ catches issues that a direct question would miss. It’s a core part of advanced prompt engineering workflows.

    4. Give Claude Positive Instructions, Not Just Prohibitions

    Claude 4.x models respond significantly better to positive framing than to prohibitions. ‘Only use data provided in the context below’ consistently outperforms ‘Do not make up information.’ ‘Use bullet points with one sentence each’ outperforms ‘Don’t write long paragraphs.’

    This is not a minor stylistic point, it is a documented pattern in how the model processes instructions. Every time you write ‘don’t do X’ in a prompt, reframe it as ‘do Y instead.’

    Avoid: Using aggressive capitalisation like ‘CRITICAL!’ or ‘YOU MUST NEVER’ in Claude prompts. According to practitioners and Anthropic’s own documentation, this overtriggers the model and produces worse outputs than calm, direct instructions. Just say what you want. Claude follows instructions precisely when they are clearly stated.

    5. Use Few-Shot Examples Inside <example> Tags

    When you need Claude to match a very specific format, a particular house style for drawing notes, a specific BOM layout, a client-specified specification format, provide one or two examples directly in the prompt wrapped in <example> tags.

    Example tags of prompt code in claude ai

    This technique eliminates most of the editing you would otherwise do after the fact. Claude matches the length, tone, structure, and technical register of your examples with high fidelity, because the tags signal clearly what is an instruction and what is a model to follow.

    Claude vs ChatGPT for Engineering Work: What’s Actually Different

    Both models are capable. Choosing the right one for the task saves time and produces better results than defaulting to one tool for everything. When comparing Claude vs ChatGPT for engineering tasks, the difference comes down to workflow needs.

    Task TypeClaude AdvantageChatGPT Advantage
    Long document analysis200K token context handles entire specification packages, full drawing sets, or long project histories in one sessionShorter documents where conversational back-and-forth refines the output
    Structured outputs (specs, notes, BOMs)XML tag structuring produces highly consistent, format-controlled outputs across multiple runsMore flexible when format requirements are loose or undefined
    Complex multi-step reasoningExtended Thinking mode excels at design reviews, multi-condition checks, and reasoned engineering decisionsChain-of-thought prompting works well but is less systematically consistent
    Following detailed instructionsLiteral instruction-following, what you specify is what you get, highly predictableMore forgiving of vague prompts, fills gaps with reasonable defaults
    Real-time web researchNo native web search in standard use, all context must be in the promptWeb search integration available, better for tasks requiring current data
    Creative, open-ended tasksStrong but benefits from explicit style/tone instructionsSlightly more natural for freeform creative output without heavy structuring

    The most productive professionals in 2026 do not pick one model and stick to it. They use Claude for structured, long-context, precision-critical tasks and ChatGPT when they need web access or conversational iteration. The right tool for the task, not loyalty to a brand.

    Claude prompts for engineers | AI engineering workflow | Claude AI CAD design

    Ready-to-Use Claude Prompt Templates for Engineering Tasks

    Copy, adapt, and save these. Each uses the XML structure and technique principles covered above, they are not hypothetical examples, they are the starting point for real engineering workflow tasks.

    TaskClaude Prompt Template (adapt for your project)
    Drawing general notes<role>Structural drafter, AISC standards, US projects.</role><task>Write 5 general notes for a steel fabrication drawing. Cover: steel grade (A992/A36), weld standard (AWS D1.1), bolt grade (ASTM A325), surface prep (SSPC-SP6), and inspection requirements.</task><format>Numbered list. Max 12 words per note. No abbreviations.</format>
    Design brief summary<role>Senior mechanical engineer.</role><task>Convert the requirements below into a one-paragraph engineering brief for a CAD outsource partner. Include: part function, key dimensions, material, tolerance class, and required file format.</task><context>[Paste your raw requirements here]</context><format>Max 120 words. Plain English. No jargon.</format>
    Drawing review checklist<role>Senior structural engineer reviewing a drawing package before issue to fabrication.</role><task>Review the following drawing notes and flag any issues. Check for: missing tolerances, unspecified materials, ambiguous weld callouts, missing revision references, conflicting dimensions.</task><context>[Paste drawing notes here]</context><format>Bullet list. Each issue: flag as HIGH/MED/LOW. One sentence per item.</format>
    Specification writing<role>Mechanical engineer, pressure vessel experience, ASME BPVC knowledge.</role><task>Write a material and fabrication specification for the component described in <context>. Think through key functional requirements first, then write the spec.</task><context>[Paste component description]</context><format>Numbered paragraphs. Max 200 words total. Reference ASME standards where relevant.</format>
    RFI response<role>Project structural engineer responding to a steel fabricator RFI.</role><task>Write a formal RFI response to the query in <context>. Be precise and conclusive. Reference the drawing number provided.</task><context>[Paste RFI text and drawing number]</context><format>Max 150 words. Professional tone. Conclude with a clear decision or instruction.</format>

    Save these as Projects in Claude: Claude’s Projects feature lets you save a system prompt that applies to every conversation in that project. Set your role, standards, and output format preferences once, and every task you bring to that project inherits them automatically. This is the single fastest way to eliminate repetitive prompt setup.

    Frequently Asked Questions

    1. What is prompt engineering for Claude AI?

    Prompt engineering Claude AI is the process of structuring instructions using techniques like XML tags Claude, role prompting, and constraints to get accurate outputs.

    2. What are XML tags in Claude AI?
    XML tags Claude
    are structured labels that separate instructions, context, and examples, improving clarity and output quality.

    3. What makes Claude different from ChatGPT?
    The key difference in Claude vs ChatGPT prompt engineering is:

    ChatGPT → flexible, conversational tasks

    Claude → structured, precise, long-context tasks

    4. How do I activate extended thinking in Claude?

    Ask Claude to reason through the problem step by step before giving its final answer. For Claude API users, there is also an extended_thinking parameter. In the chat interface, explicitly asking Claude to ‘think through’ a problem activates deeper reasoning.

    5. Can Claude read full engineering drawing packages?

    Yes, Claude supports up to 200,000 tokens of context (approximately 500 pages of text). You can paste full specification documents, drawing notes, or project histories and ask Claude to analyse, summarise, or cross-reference across all of it.

    6. What is the Claude Projects feature?

    Claude Projects lets you set a persistent system prompt that applies to every conversation in that project your role, standards preferences, output format rules, and context. It eliminates repetitive setup and makes outputs more consistent across sessions.

    7. Do I need coding skills to use Claude for engineering tasks?

    No. XML tags look like code but require no programming knowledge, they are just labelled brackets around sections of your prompt. All the techniques in this guide work in plain text in the Claude.ai chat interface.

    8. How do I write better prompts for Claude AI?
    Learn how to write better prompts for Claude AI by using:

    • Structured inputs
    • Role definitions
    • Clear format instructions
    • Context-based prompting

    The Bottom Line

    Claude AI is genuinely one of the most capable tools available for professional engineering work in 2026 for writing specifications, reviewing drawings, structuring technical documents, and reasoning through design decisions. But it rewards structured input. Vague prompts produce vague outputs.

    The techniques in this guide, XML tagging, specific role prompts, extended thinking, positive framing, and few-shot examples, are not advanced developer tricks. They are practical communication habits that take about a week to build and pay back every time you use Claude for a real task.

    Start with one change: the next prompt you write for Claude, add a <role>, a <task>, and a <format> tag. Compare that output to what you were getting before. The difference is usually immediate and obvious.

    Put Claude to Work on Your Engineering Projects, Without the Learning Curve

    SimuTecra uses Claude AI and other AI tools inside our drafting and design workflows, so the speed and accuracy benefits pass directly to you. Every drawing still goes through expert human review before delivery. You get faster turnaround without trading quality for it.

    Tell us about your project and we will come back with a clear scope and quote.

  • Prompt Engineering for CAD Drafting and Engineering Design: A Practical Guide | SimuTecra

    Prompt Engineering for CAD Drafting and Engineering Design: A Practical Guide | SimuTecra

    The engineers getting the most out of AI tools right now are not the ones with the best software, they are the ones mastering prompt engineering for engineering design. In CAD drafting and design workflows, the difference between a useful AI output and a useless one often comes down to a single sentence.

    Prompt engineering for engineering design, the skill of writing precise, structured instructions that guide AI models, is rapidly becoming one of the most valuable technical skills. Whether you are using ChatGPT for engineers, working with AI prompts for CAD drafting, or experimenting with text-to-CAD tools, the quality of your prompt determines the quality of your result.

    This guide is written for engineers, CAD drafters, and technical managers who want to understand prompt engineering CAD workflows, improve efficiency, and use AI engineering tools 2026 effectively.

    This guide is written specifically for engineers, CAD drafters, and technical managers. It covers what prompt engineering is, why it matters for engineering workflows, how to write prompts that actually work for design and drafting tasks, and the common mistakes that waste time.

    What Is Prompt Engineering, and Why Should Engineers Care?

    Prompt engineering is the practice of designing structured inputs to generate accurate and useful outputs from AI systems. In the context of AI for CAD, this means giving detailed, technical instructions that align with real engineering requirements.

    For engineers, this matters because AI-assisted drafting and generative CAD tools are becoming part of daily workflows. Platforms like Autodesk AI, SolidWorks AI, and other CAD AI tools are enabling faster design iterations, automation, and even generative design prompts for complex parts.

    But these tools depend heavily on how well you communicate with them.

    None of these tools work well with vague instructions. Tell an AI to ‘design a bracket’ and you will get something generic that requires significant rework. Tell it to ‘design a steel mounting bracket for a 15 kg HVAC unit, bolted to a 150×150 RHS column, with four M12 bolt holes on a 100 mm bolt circle, material grade 350’ and you get something you can actually evaluate.

    Prompt engineering is not a skill reserved for software developers. Any engineer or drafter who uses AI tools is already doing it, the question is whether they are doing it well.

    According to the Prompt Engineering Guide, one of the most widely cited references in the field, the key principles are specificity, context, format instructions, and iterative refinement. All four apply directly to engineering AI tasks.

    This is where prompt engineering CAD becomes critical.

    The Anatomy of a Good Engineering Prompt

    Most engineers who are disappointed with AI outputs are writing prompts that are too short, too vague, or missing critical context. A well-structured engineering prompt has five components — and most poorly written prompts are missing at least three of them.

    ComponentWhat It DoesEngineering Example
    Role / contextTells the AI who it is and what domain it is working in“You are a structural engineer producing fabrication drawings to AISC standards.”
    TaskStates clearly what you want the AI to produce“Write a material specification note for a hot-dip galvanised steel handrail.”
    ConstraintsDefines the boundaries, standards, dimensions, format, word count“Use ASTM A123 for galvanising. Maximum 80 words. Use bullet points.”
    Context / inputsProvides the specific data, dimensions, or design parameters the AI needs“The handrail is 1100 mm high, 48.3 mm OD tube, Grade 350 steel, outdoor exposed environment.”
    Output formatTells the AI how to structure or present the result“Present as a numbered list suitable for inclusion in a drawing general notes section.”

    Weak Prompt vs Strong Prompt: Side-by-Side

    Weak PromptStrong Prompt
    Write a specification for a steel beam.You are a structural engineer. Write a material and fabrication specification note for a 310UB46.2 Grade 350 steel floor beam. Include: steel standard (AS/NZS 3678), surface preparation (Sa 2.5), primer coat (75 micron epoxy zinc phosphate), and web stiffener requirements at point load locations. Maximum 100 words. Format as numbered notes for inclusion on a shop drawing.
    Create a 3D model of a bracket.Generate a parametric 3D model of a flat plate mounting bracket. Plate dimensions: 150 mm x 100 mm x 8 mm thick. Four M10 clearance holes (11 mm diameter) at 20 mm from each corner. Material: mild steel, Grade 250. Two 10 mm radius fillets at the base. Output as a STEP file compatible with SolidWorks.
    Summarise this drawing.You are reviewing an engineering drawing for a pressure vessel flange. Summarise the following drawing notes in plain English for a non-technical project manager. Include: material grade, pressure rating, surface finish requirement, and any special inspection notes. Maximum 150 words.

    Key insight: The strong prompt takes about 30 seconds longer to write. The output it produces takes minutes less to rework. In a workflow where you run dozens of AI tasks per day, that ratio compounds quickly.

    You may also like 20 Best Claude Prompt Every Engineer Should Used

    Text-to-CAD AI software interface showing a natural language prompt input field and the resulting 3D CAD model geometry
    Text-to-CAD tools like Zoo Design Studio and Leo AI generate editable 3D models directly from structured text prompts, the quality of the prompt directly determines the usability of the output.

    Prompt Engineering Techniques That Work in Engineering Contexts

    Several well-established prompting techniques from the AI field translate directly into engineering and CAD workflows. These are not theoretical, they produce measurably better outputs on the kinds of tasks engineers do every day.

    1. Few-Shot Prompting

    Few-shot prompting means showing the AI one or two examples of exactly what you want before making your actual request. This is one of the most reliable techniques for enforcing a specific format or terminology standard.

    Engineering application: If you want drawing notes written in a specific house style, provide one or two examples of your existing notes before asking the AI to write the new one. The AI will match the format, tone, and structure precisely, saving significant editing time.

    2. Chain-of-Thought Prompting

    Chain-of-thought prompting asks the AI to reason through a problem step by step before giving a final answer. For engineering design decisions, this is particularly useful because it forces the AI to surface its assumptions, which you can then verify or correct.

    Engineering application: When using AI to evaluate whether a connection detail is appropriate, ask it to ‘first list the load conditions, then check the bolt capacity, then check the plate thickness, then give a pass/fail verdict.’ The step-by-step reasoning is far easier to audit than a single-sentence answer.

    3. Role Assignment

    Assigning the AI a specific expert role at the start of the prompt significantly improves output quality for technical tasks. ‘You are a mechanical engineer specialising in pressure vessels’ produces more technically accurate output than no role assignment at all, because it activates the relevant domain knowledge the model has been trained on.

    Engineering application: Use role assignment every time you need domain-specific accuracy, ‘You are a structural drafter working to AISC standards,’ ‘You are a civil engineer reviewing a drainage calculation,’ ‘You are a CAD technician producing a BOM from an assembly list.’

    4. Constraint Setting

    One of the most common prompt failures in engineering contexts is not setting explicit constraints on format, length, or standards compliance. Without constraints, the AI defaults to verbose, generic output. With them, you get precise, usable content.

    Engineering application: Always specify: the applicable standard (ASME, ISO, AISC, AS/NZS), the output format (bullet list, table, numbered notes, paragraph), the length limit (maximum 100 words, one sentence per item), and the audience (fabricator, project manager, inspecting engineer).

    5. Iterative Refinement

    Iterative prompting treats AI output as a draft, not a final answer. After the first output, follow up with specific correction instructions, ‘Change the bolt grade from 8.8 to 10.9,’ ‘Remove the reference to ISO and replace with ASME Y14.5,’ ‘Shorten the second note to one sentence.’ This is far faster than rewriting from scratch and gives you full control over the final result.

    Common mistake: Treating AI output as final without review. AI tools do not know your project-specific constraints, your client’s preferences, or your jurisdiction’s code requirements. Prompt engineering improves the starting point, human engineering judgment remains non-negotiable for review and sign-off.

    Real-World Prompt Engineering Use Cases in CAD and Engineering Design

    Here’s how engineers are applying prompt engineering for engineering design in real workflows:

    TaskAI Tool TypeExample Prompt Skeleton
    Generating drawing general notesChatGPT / Claude“You are a mechanical drafter. Write 5 general notes for a machined aluminium part drawing to ASME Y14.5. Include: material spec, surface finish default, deburring requirement, heat treatment, and inspection standard. Maximum 15 words per note.”
    Writing a design brief summaryChatGPT / Claude“Summarise the following design requirements into a one-paragraph engineering brief suitable for issuing to a CAD outsource partner. Include: part function, key dimensions, material, tolerance class, and delivery format. [Paste requirements below]”
    Generating 3D geometry from descriptionZoo / Leo AI / Fusion 360 AI“Generate a parametric 3D model of a [part name]. Dimensions: [list]. Material: [grade]. Key features: [holes, threads, fillets]. Output format: STEP AP214. Optimise for CNC machining.”
    Automating BOM descriptionsChatGPT / Claude“You are a structural drafter. Convert the following list of steel members into a formatted Bill of Materials table with columns: Mark, Description, Section Size, Grade, Length (mm), Qty, Finish. Apply consistent naming to AISC conventions. [Paste member list]”
    Reviewing a drawing for completenessChatGPT / Claude“You are a senior mechanical engineer reviewing a drawing for issue to fabrication. Check the following drawing notes for: missing tolerances, unspecified material, ambiguous surface finish callouts, and missing revision references. Flag each issue as HIGH / MEDIUM / LOW priority. [Paste drawing notes]”
    Drafting an RFI responseChatGPT / Claude“You are a structural engineer. Write a formal RFI response addressing the following query from a steel fabricator. Tone: professional and concise. Maximum 150 words. Reference the relevant drawing number. [Paste RFI query]”
    Engineer using AI-assisted CAD tools at a workstation, with design software and AI interface visible on screen
    Prompt engineering is now a practical daily skill for engineers who want to get faster, more accurate results from AI tools, without sacrificing technical quality.

    The Most Common Prompt Engineering Mistakes Engineers Make

    • Being too vague on dimensions and standards: ‘Design a structural connection’ gives the AI nothing to work with. Always specify member sizes, loads, applicable standard, and material grade.
    • Skipping the role assignment: Without a defined role, AI defaults to a generalist voice. Set the role in every prompt that requires domain-specific accuracy.
    • Asking multiple unrelated questions in one prompt: Break complex tasks into sequential prompts. Each prompt should have one clear output goal.
    • Not specifying the output format: If you need bullet points, say so. If you need a table, say so. If you need the output in 80 words for a drawing note, state the limit.
    • Accepting the first output: The first output is a draft. Use follow-up prompts to refine, correct, and shorten until the result meets your standard.
    • Assuming AI knows your project context: AI has no memory of your project unless you include it in the prompt. Paste the relevant context, drawing notes, specifications, design parameters into every prompt that needs it.

    Frequently Asked Questions

    1. What is prompt engineering in simple terms?

    It’s the process of writing structured inputs for AI tools to improve outputs in engineering design, CAD drafting, and modeling.

    2. Can prompt engineering be used for CAD drafting?

    Yes, it’s widely used in AI prompts for CAD drafting, documentation, and text-to-CAD modeling.

    3. What AI tools do engineers use for CAD and design?

    The most widely used are ChatGPT and Claude for text tasks, Zoo Design Studio and Leo AI for text-to-CAD generation, DraftAid for automated drawing annotation, and Autodesk Fusion 360 AI and SolidWorks 2026 for AI-assisted modeling and drawing creation.

    4. Do I need coding skills for prompt engineering?

    No. Prompt engineering for most engineering tasks requires no coding, just clear, structured writing. Advanced applications like prompt chaining or API integration do benefit from coding knowledge, but everyday use does not.

    5. What is text-to-CAD?

    Text-to-CAD is a category of AI tools that generate 3D CAD models or 2D drawings from natural language text prompts. You describe the part, the AI generates the geometry as an editable CAD file.

    6. How do I write a good prompt for engineering drawings?

    Include: a role assignment (‘You are a structural drafter’), the specific task, the applicable standard, key dimensions and material, and the required output format. Be explicit, vague prompts produce generic outputs.

    7. Is AI replacing CAD engineers and drafters?

    No. AI tools handle repetitive, formulaic tasks faster, but engineering judgment, design problem-solving, and drawing review still require human expertise. AI makes skilled drafters faster, not redundant.

    The Bottom Line

    Prompt engineering is not a passing trend for engineers, it is a practical, learnable skill that directly improves the speed and quality of AI-assisted design and drafting work. The engineers who invest 20 minutes learning how to write a well-structured prompt are consistently getting better outputs from the same tools their colleagues are frustrated with.

    The five components of a good engineering prompt ,role, task, constraints, context, and output format, apply whether you are writing drawing notes, generating 3D geometry, drafting specifications, or reviewing documentation. Build the habit of including all five, and the quality of your AI outputs will improve immediately.

    At SimuTecra, we have built AI-assisted workflows into our CAD drafting and engineering design services, which means clients get the speed benefits of AI tools without the learning curve or the quality risk of unreviewed outputs.

    Want AI-Ready Engineering Drawings Without the Learning Curve?

    SimuTecra’s engineering team combines deep CAD expertise with AI-assisted workflows to deliver faster, more accurate 2D drafting packages and 3D models. You get the output, without needing to master any prompting tools yourself.

    Share your project brief and get a clear quote, no obligation.